PDF Search for Mac
PDF Search is an application which is designed to make blazing-fast search through lots of documents with the power of AI. In this manual you will find how to use it.
Setup
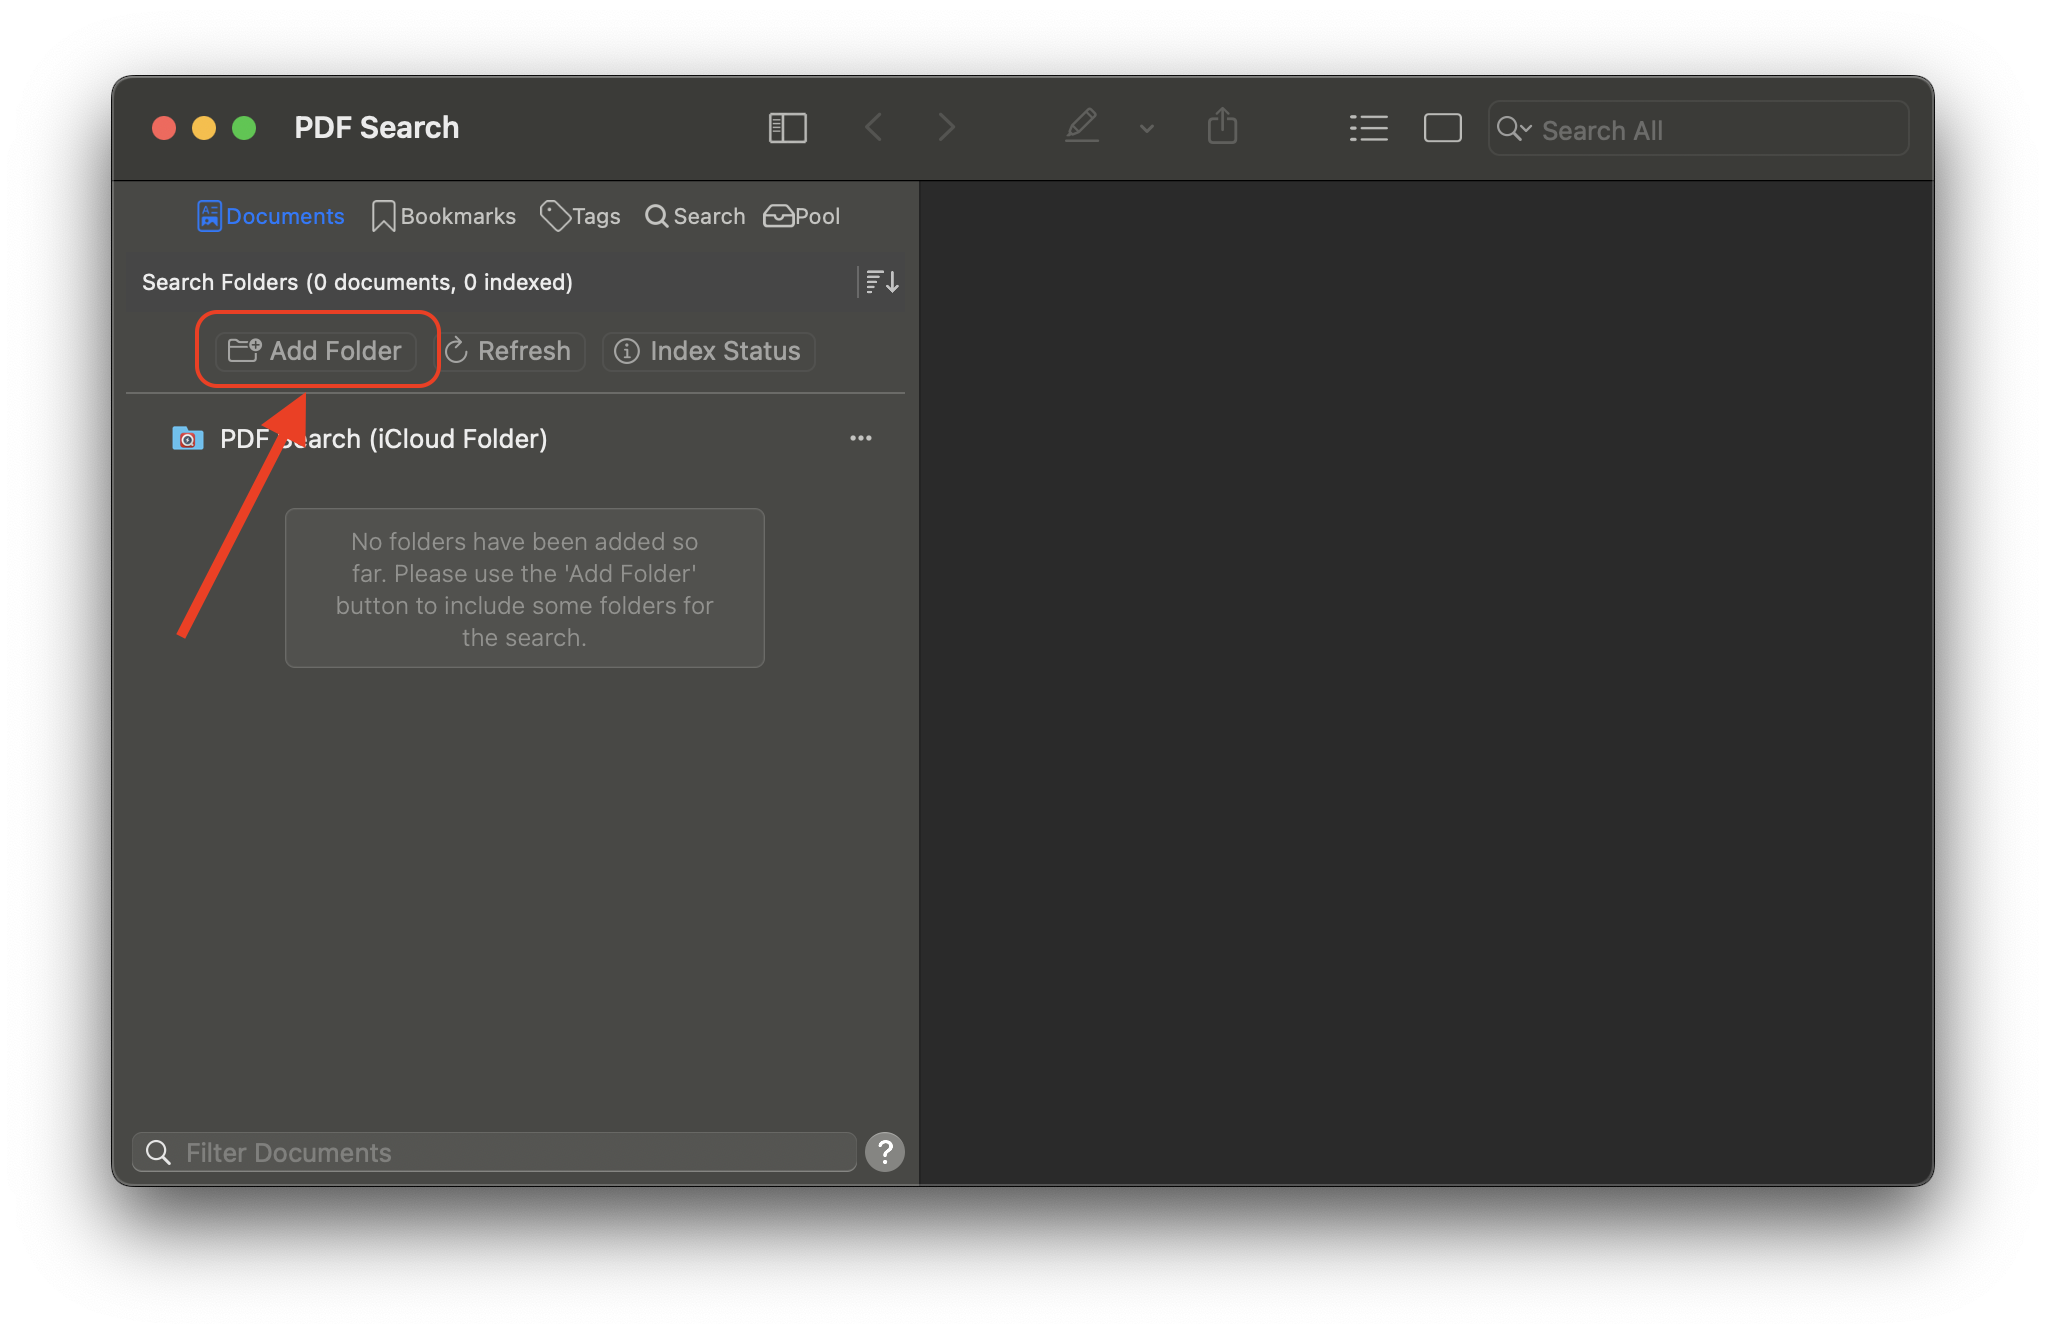
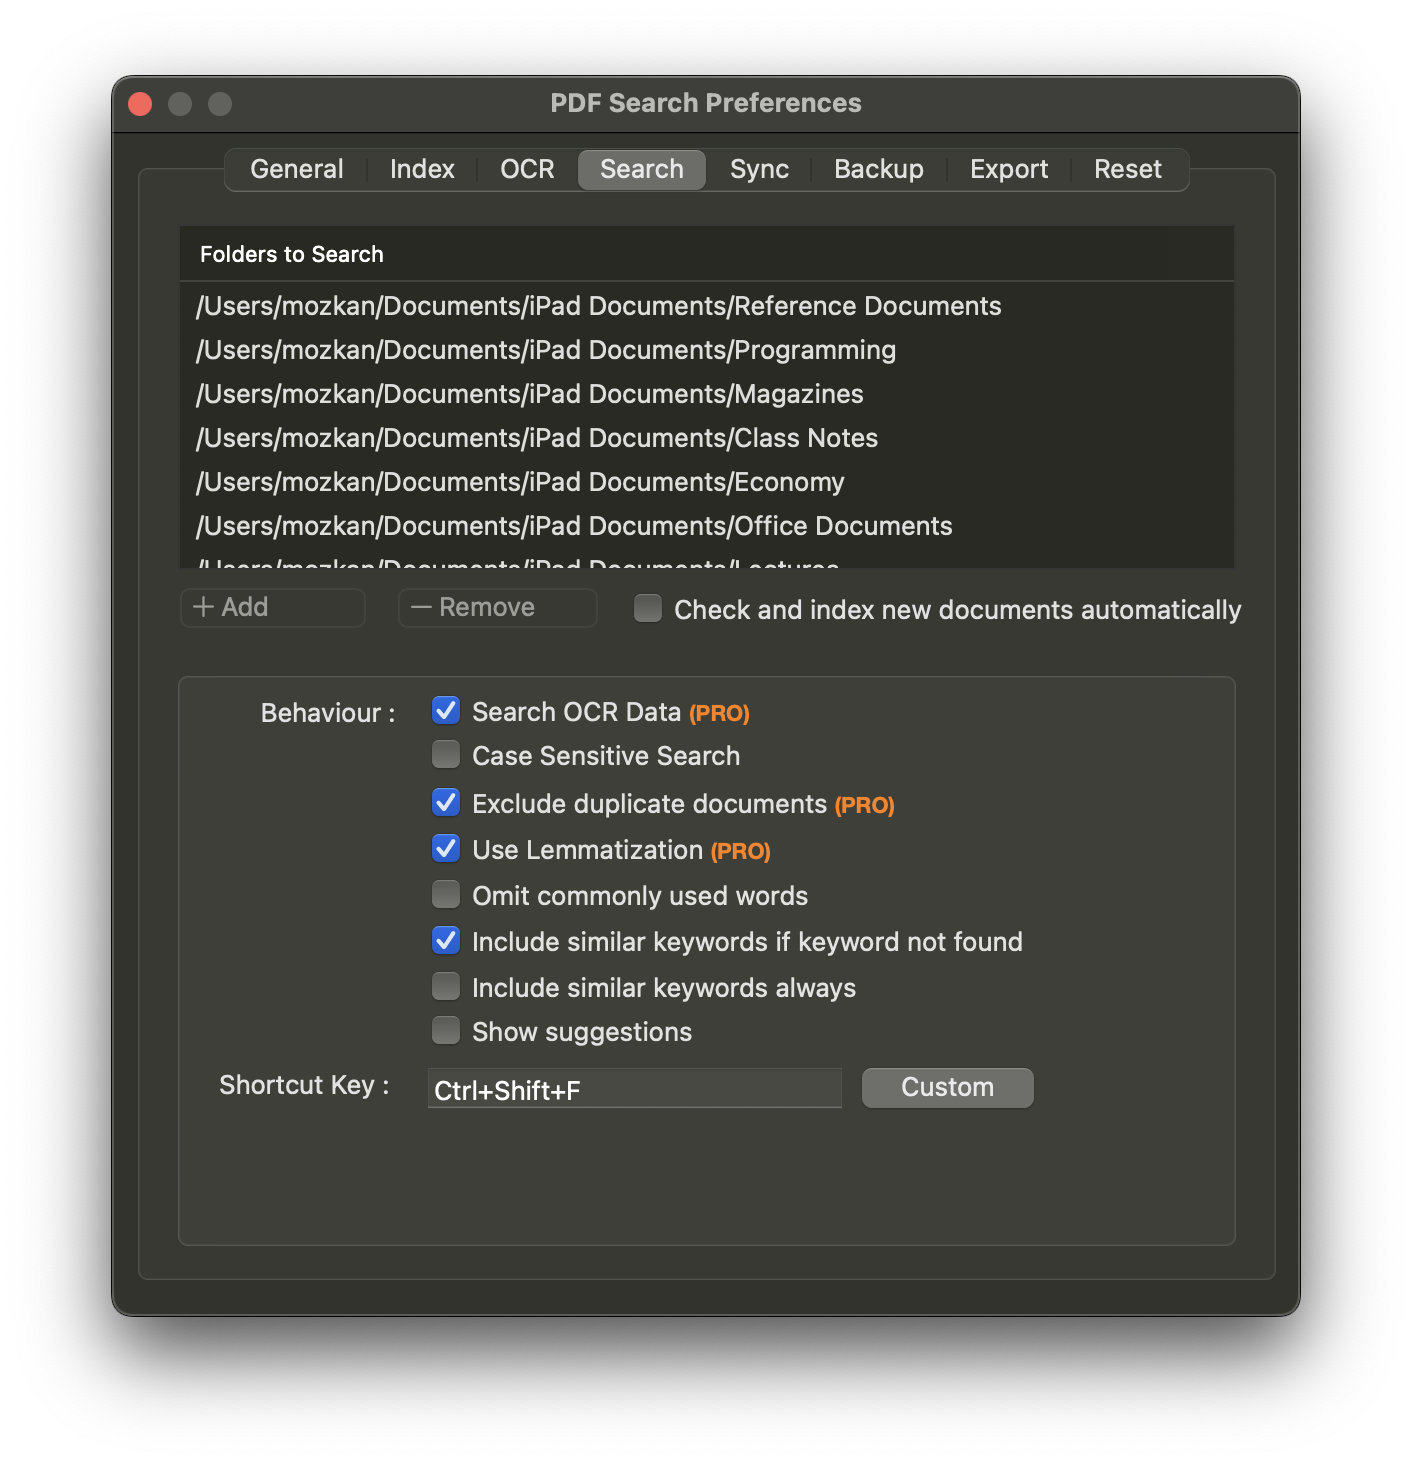
Adding Search Folders
The first thing you need to do is to tell the application in which folders to search. You can use the 'Add Folder' button for this purpose. The application will index the documents in each folder you add and make them ready for your search.
Indexing
Indexing Process
For PDF Search to function, it must first index your documents. This automatic process runs quietly in the background, cataloging every word in your documents and storing them in a database. Keep in mind that indexing is a one-off process, but it's intensive in terms of time and energy. For MacBook users, it's advisable to connect to a power source during indexing.
Documents that are not in PDF format must first be converted to PDF in order to be indexed. For this, you can use our auxiliary application, 'PDF Converter'. 'PDF Converter' works integrated with the 'PDF Search' application and converts non-PDF documents to PDF before indexing.
Download PDF Converter
Remember, indexing happens only when PDF Search is active. We suggest keeping the app open to allow the indexing to complete. If you need to exit the app, select the option for background indexing in the quit window. The indexing process is flexible; it can be paused and resumed. You have the choice to pause or continue indexing each time you open the app.
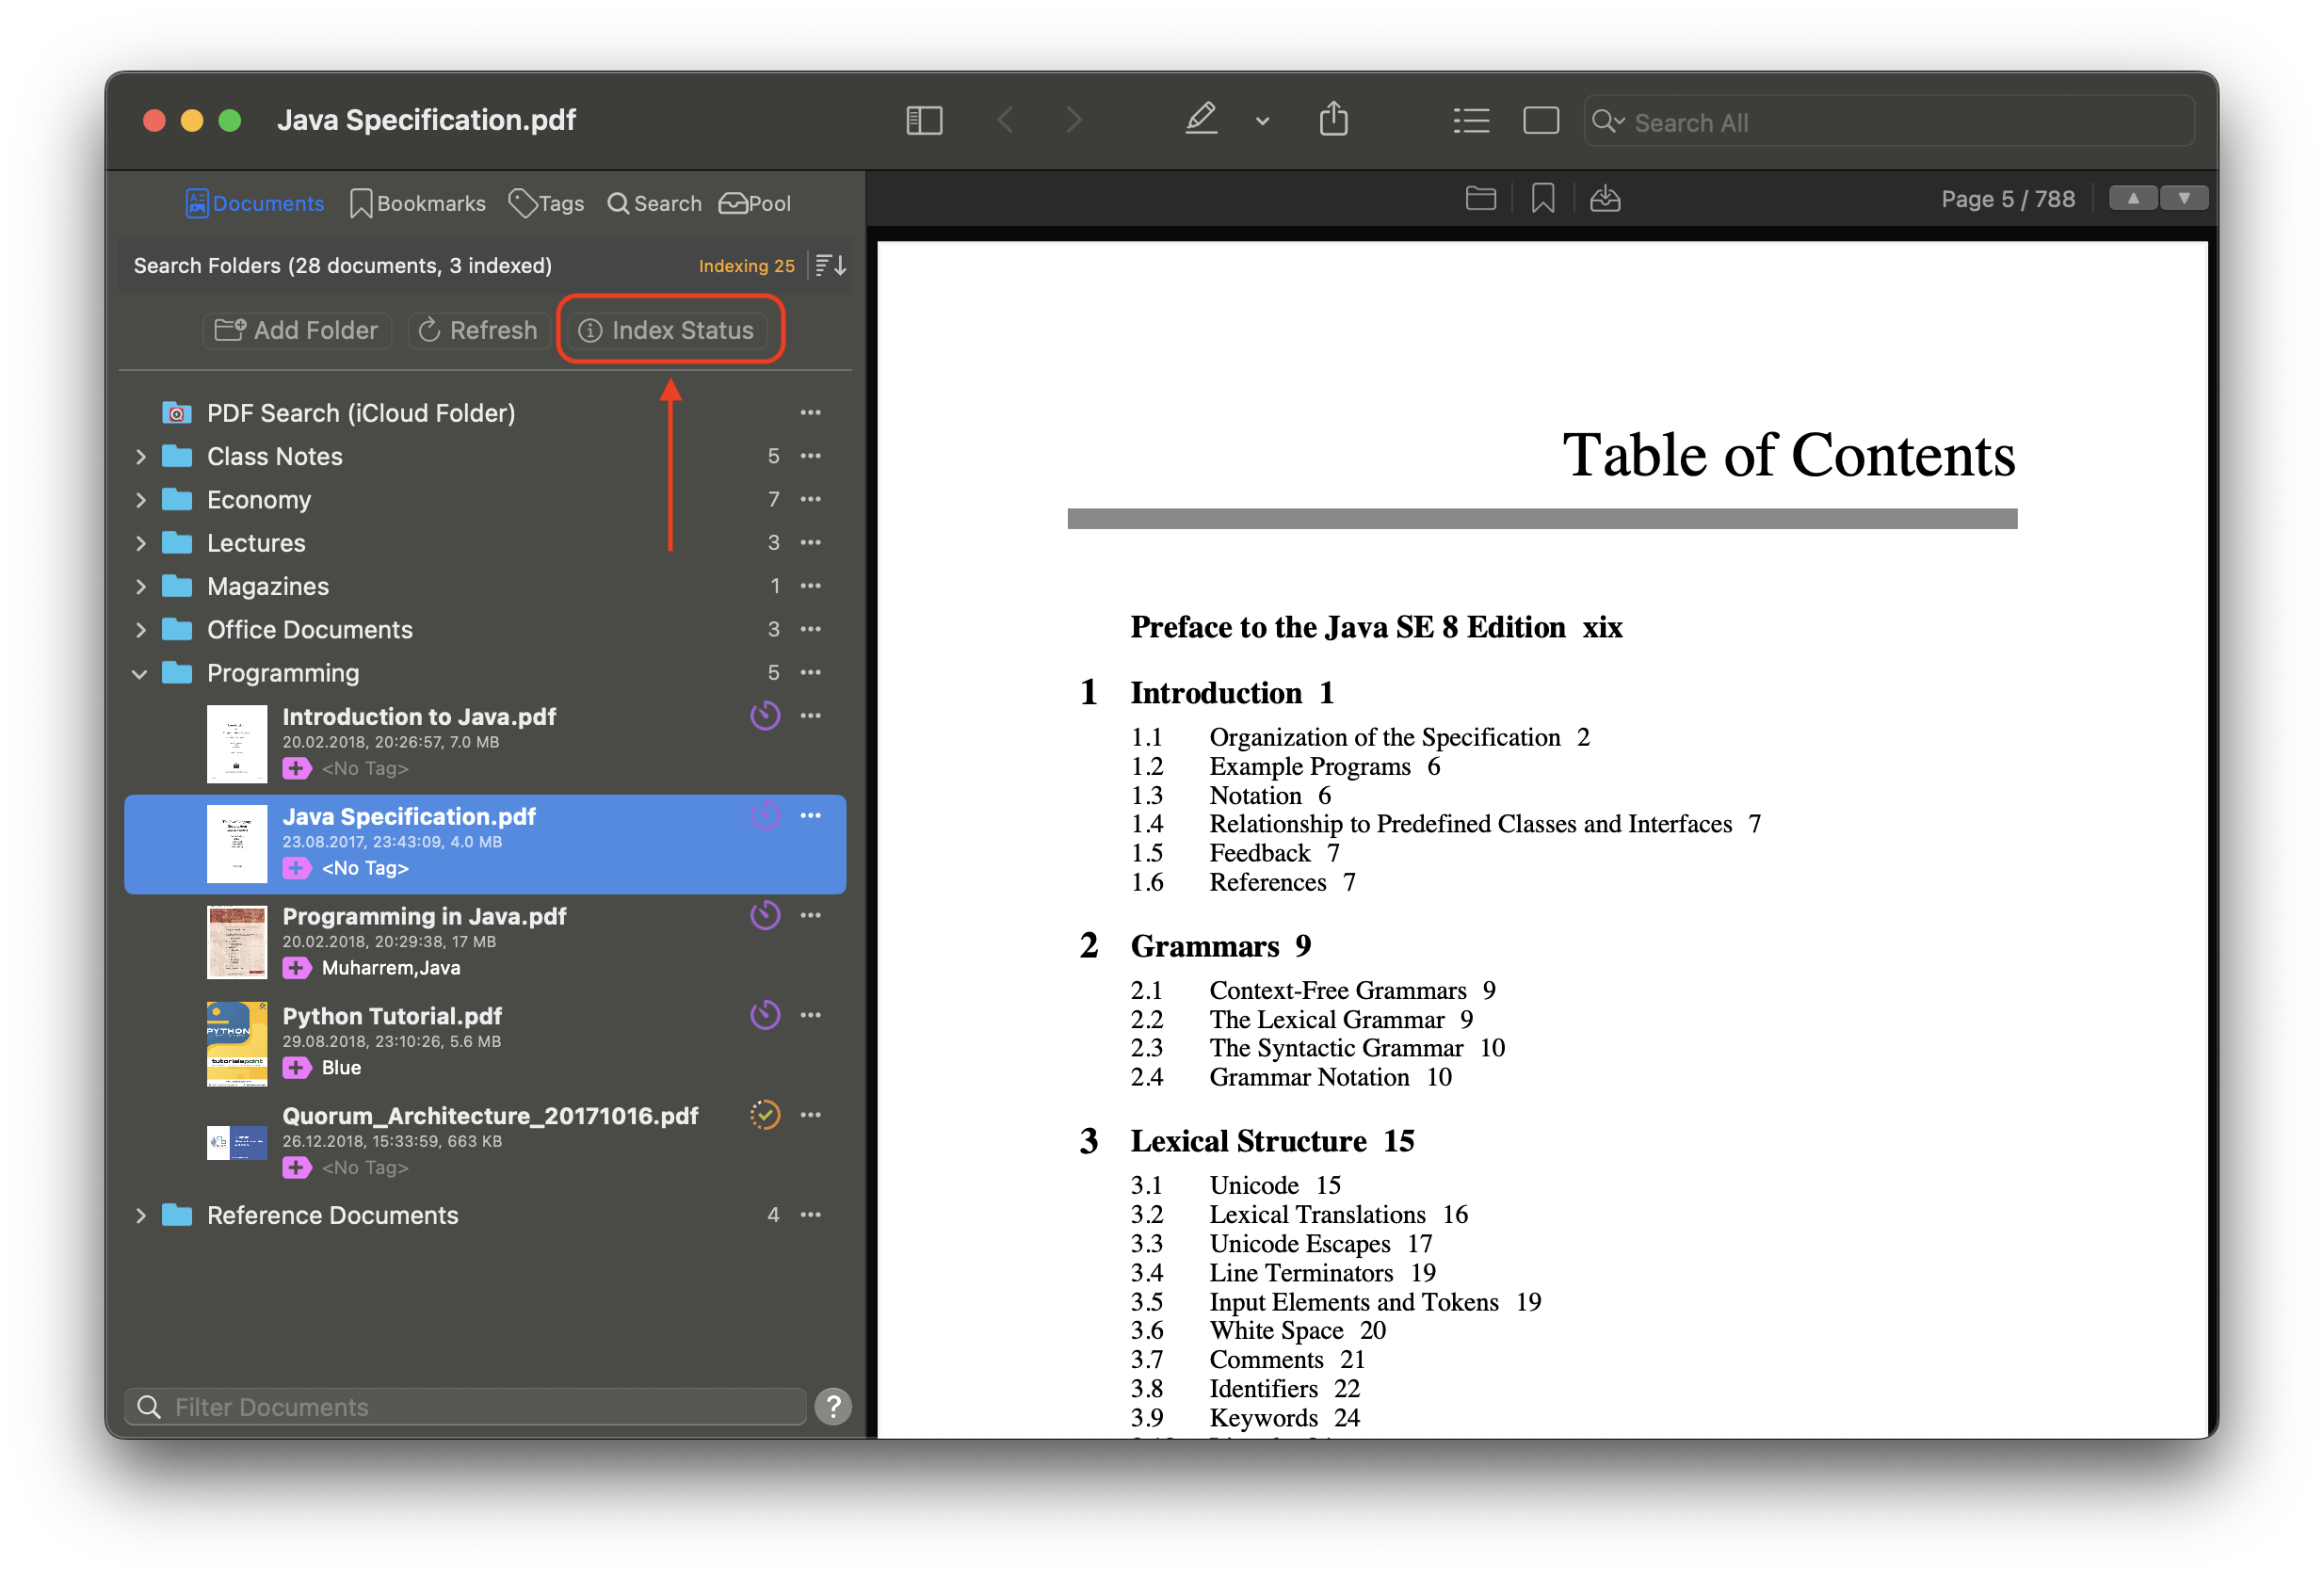
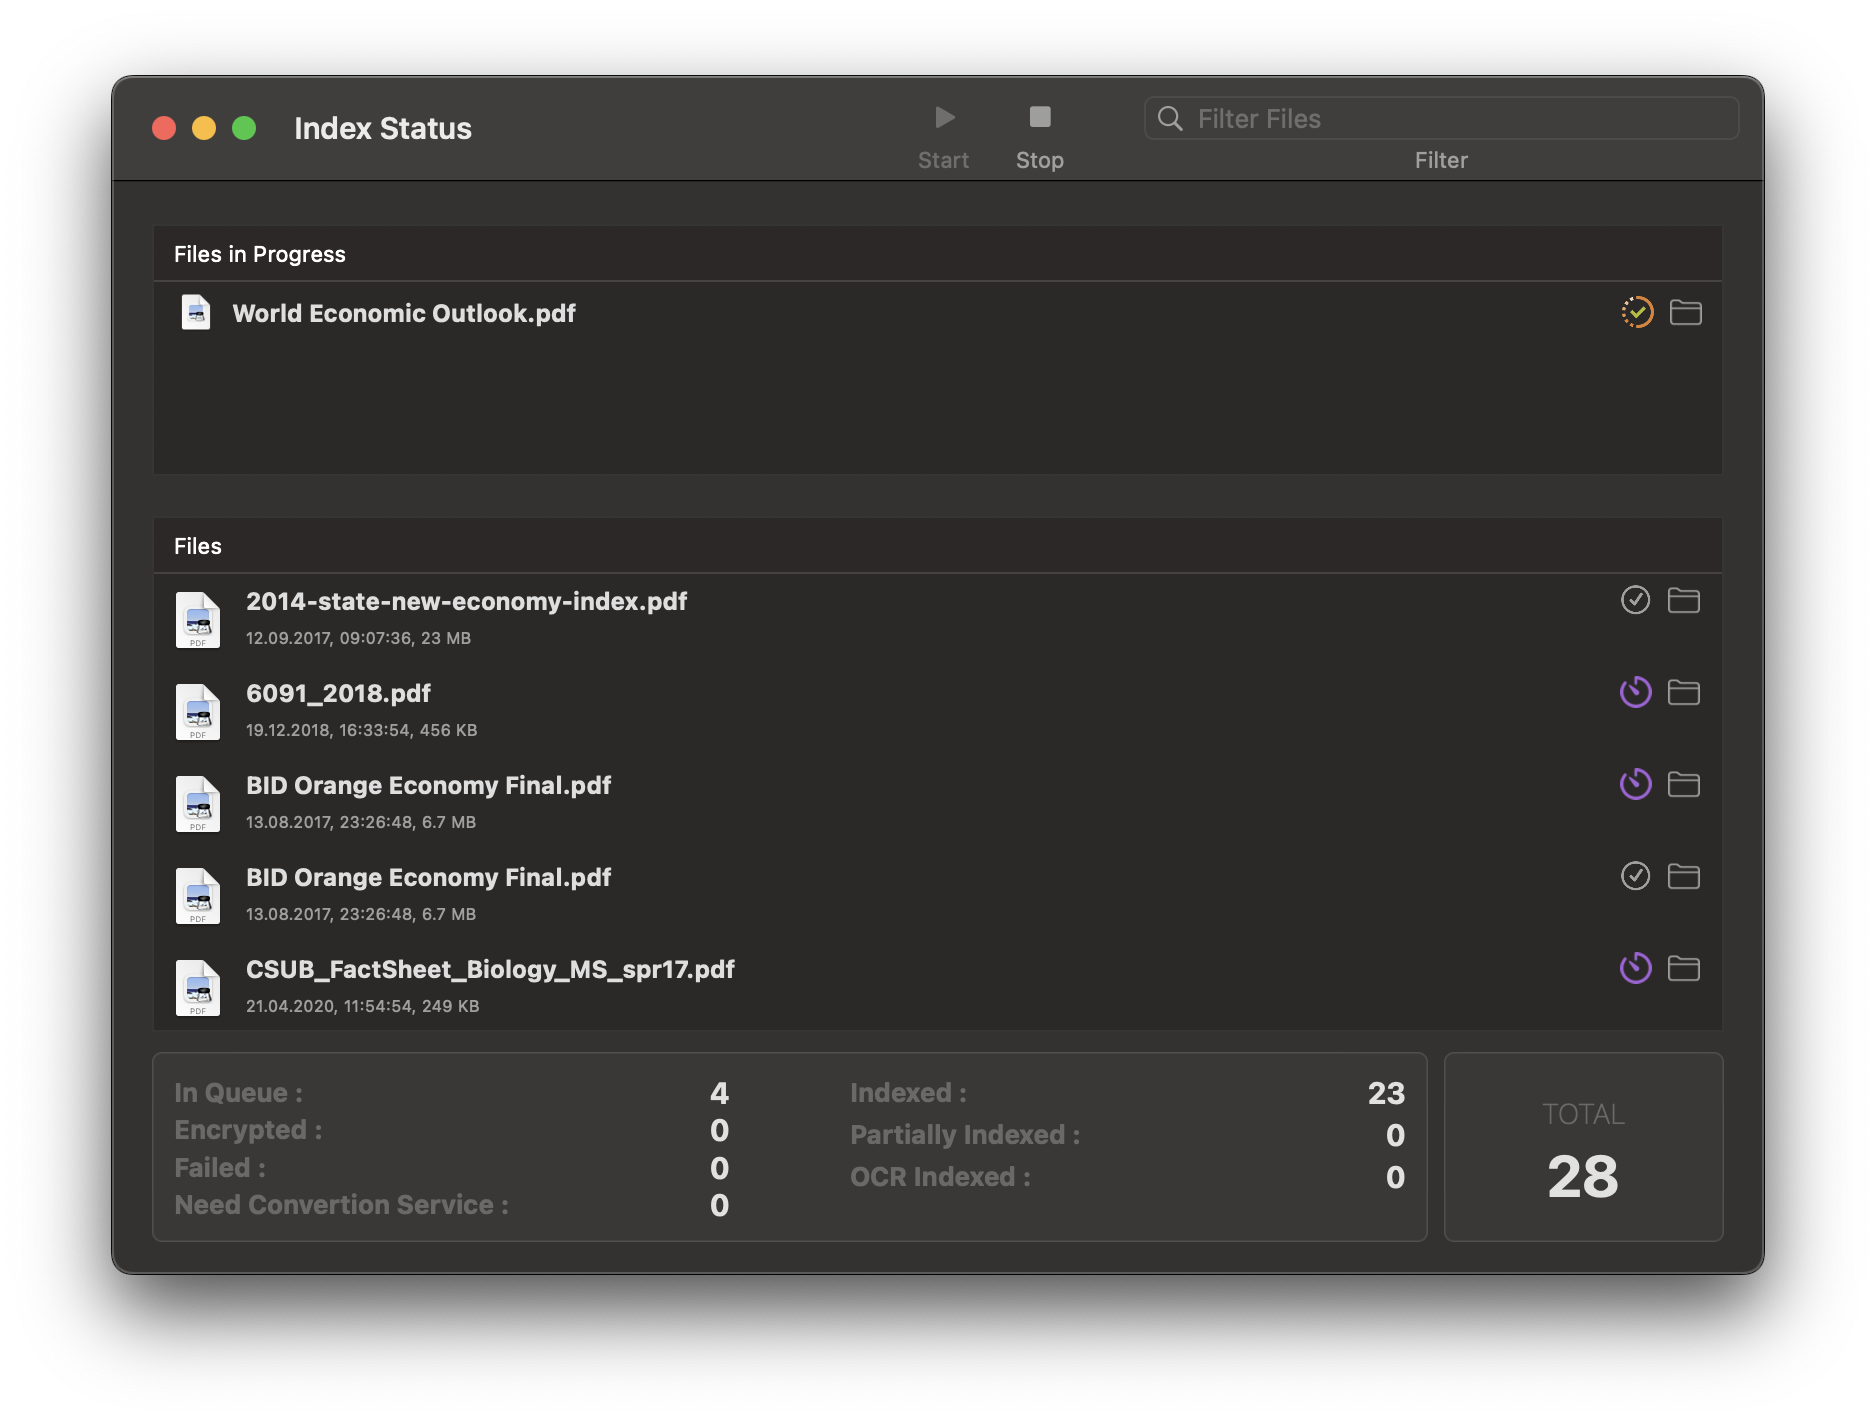
You can use the 'Index Status' window to view and manage the status of the indexing process. To open this window, simply click on the 'Index Status' button on the main screen. In this window, you can see the number of documents that are queued for indexing as well as those that have been indexed or indexed using OCR. If you wish, you can pause and resume the indexing process using the 'Start' and 'Stop' buttons found on the toolbar.
Folder Structure
PDF Search efficiently manages two primary types of folders, displayed as root folders in the navigation sidebar, from where folder navigation begins.
PDF Search iCloud Folder
Your iCloud Drive hosts a dedicated folder for the app. This folder is automatically established if iCloud Drive is activated on your device. It ensures that all documents within this folder are indexed for easy access. Additionally, this folder facilitates the sharing of documents across your iPhone or iPad. Documents added here sync automatically with your other devices running iOS or macOS.
Local Folders
These are the folders that you add from either your computer or an external drive. Every document contained within these selected folders gets indexed, making them readily searchable.
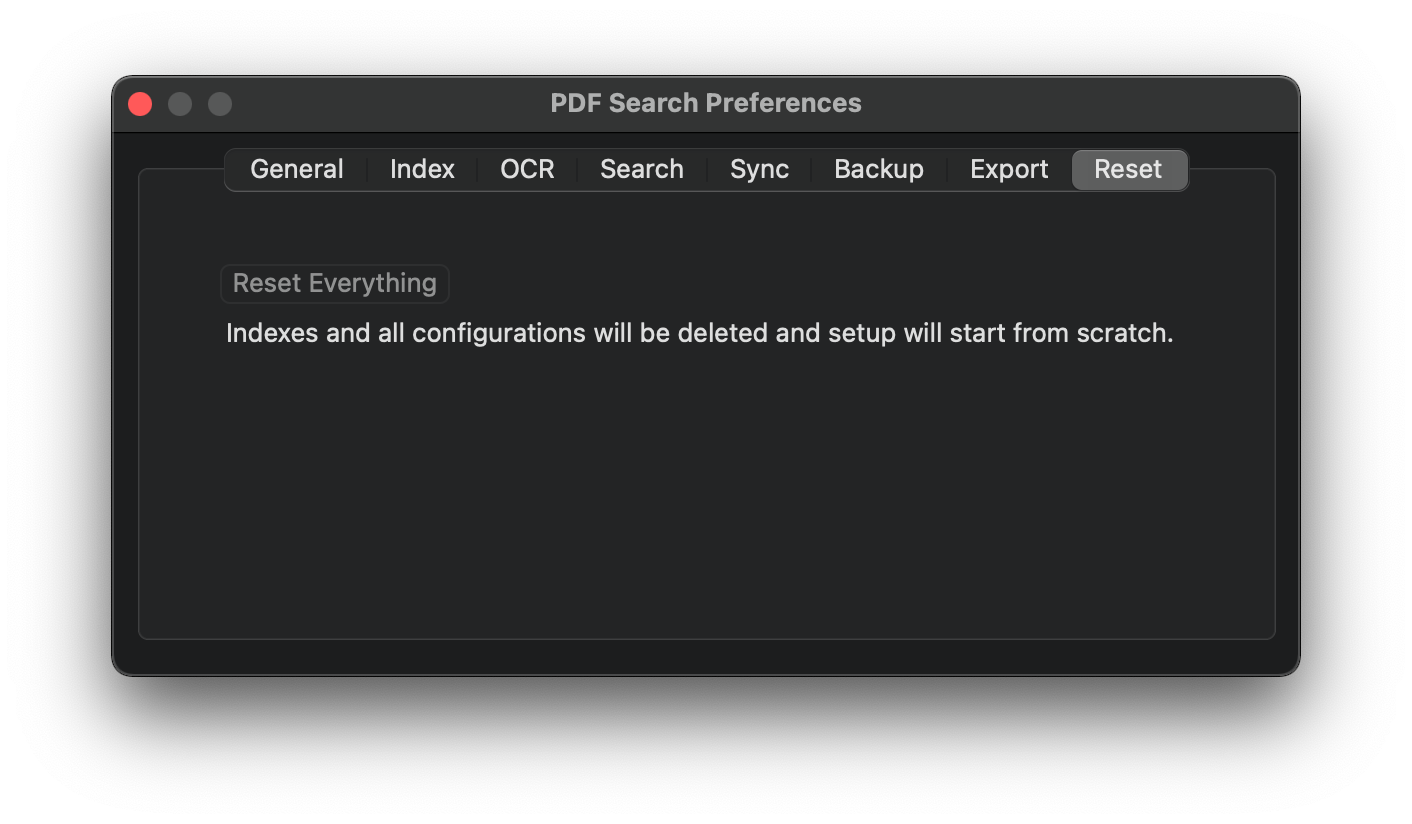
Resetting Indexes
You can reset the settings and indexes using preferences window.
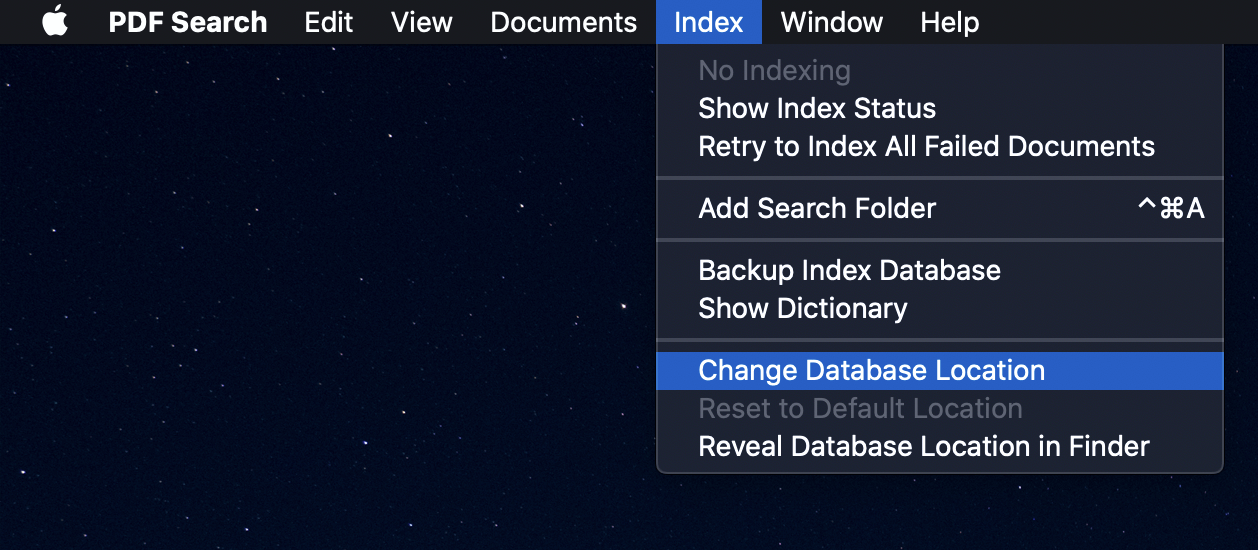
Index database location
The default location of the database is under the system drive. However, you can choose a custom location using "Application Menu -> Directory -> Change Database Location". This way, you can move the database to another location, such as an external disk, and free up space on the system drive.
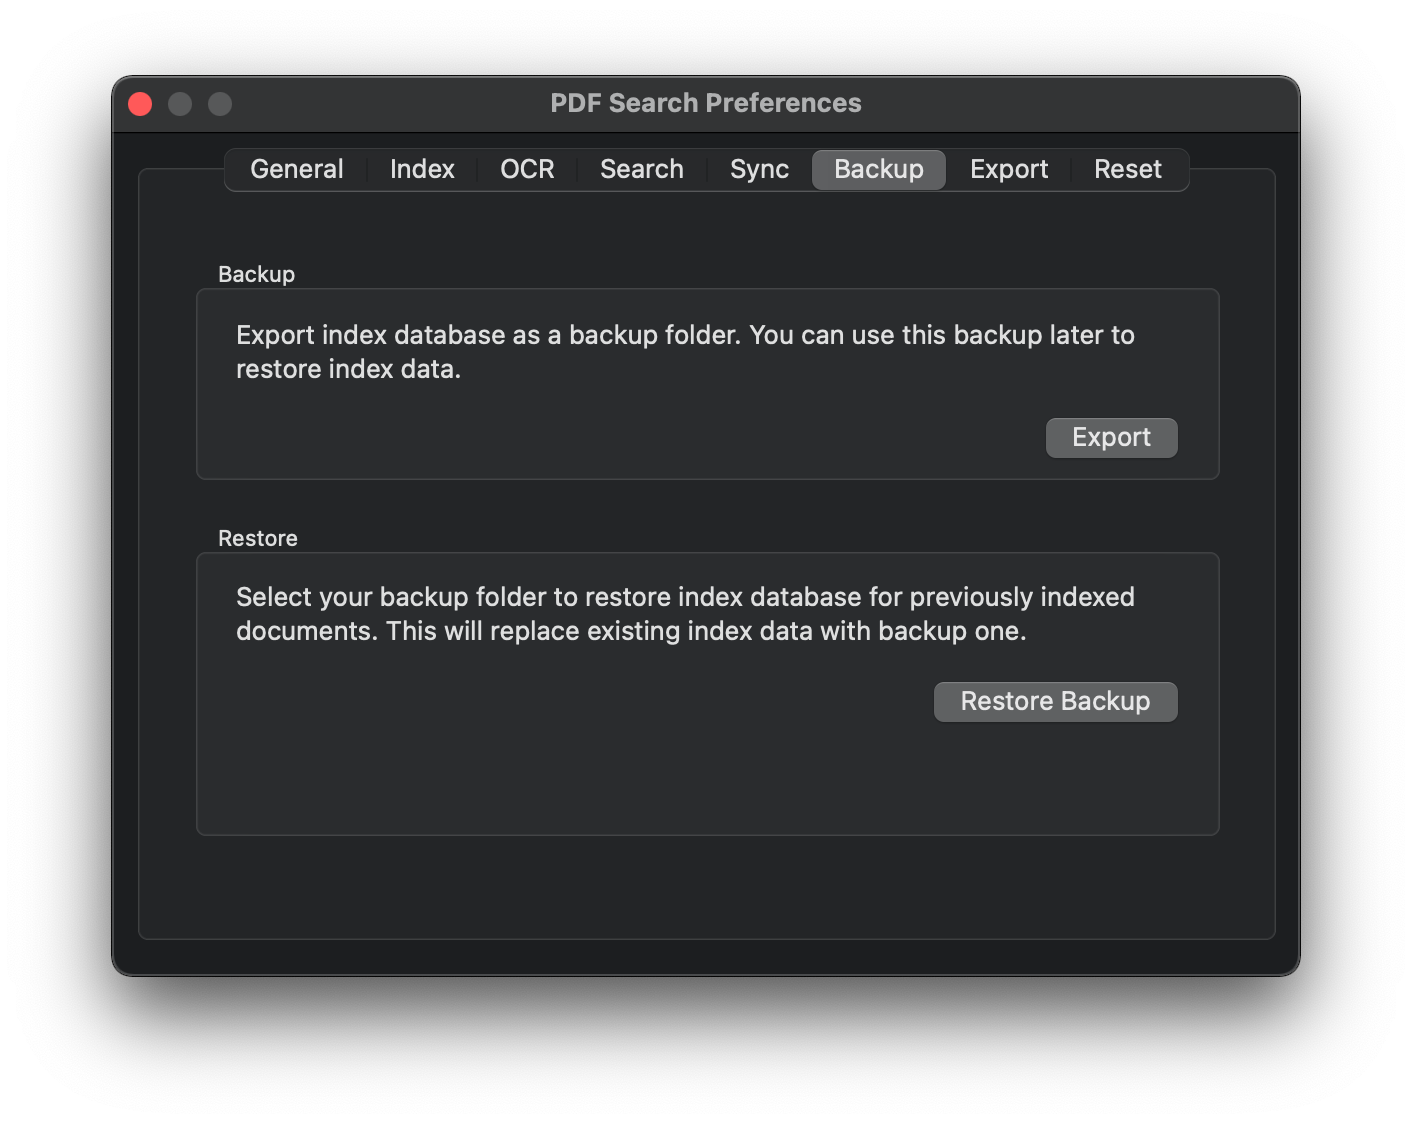
Backup/Restore Index Data
Because indexing can be a long process, it's a good idea to back up index data, especially if you have a very large document library. This way, you can directly search your documents without having to wait for the indexing process when you reinstall your computer. You can use "Application Menu -> Index -> Backup Index Database" menu option or the preferences window for this.
Search
Start search
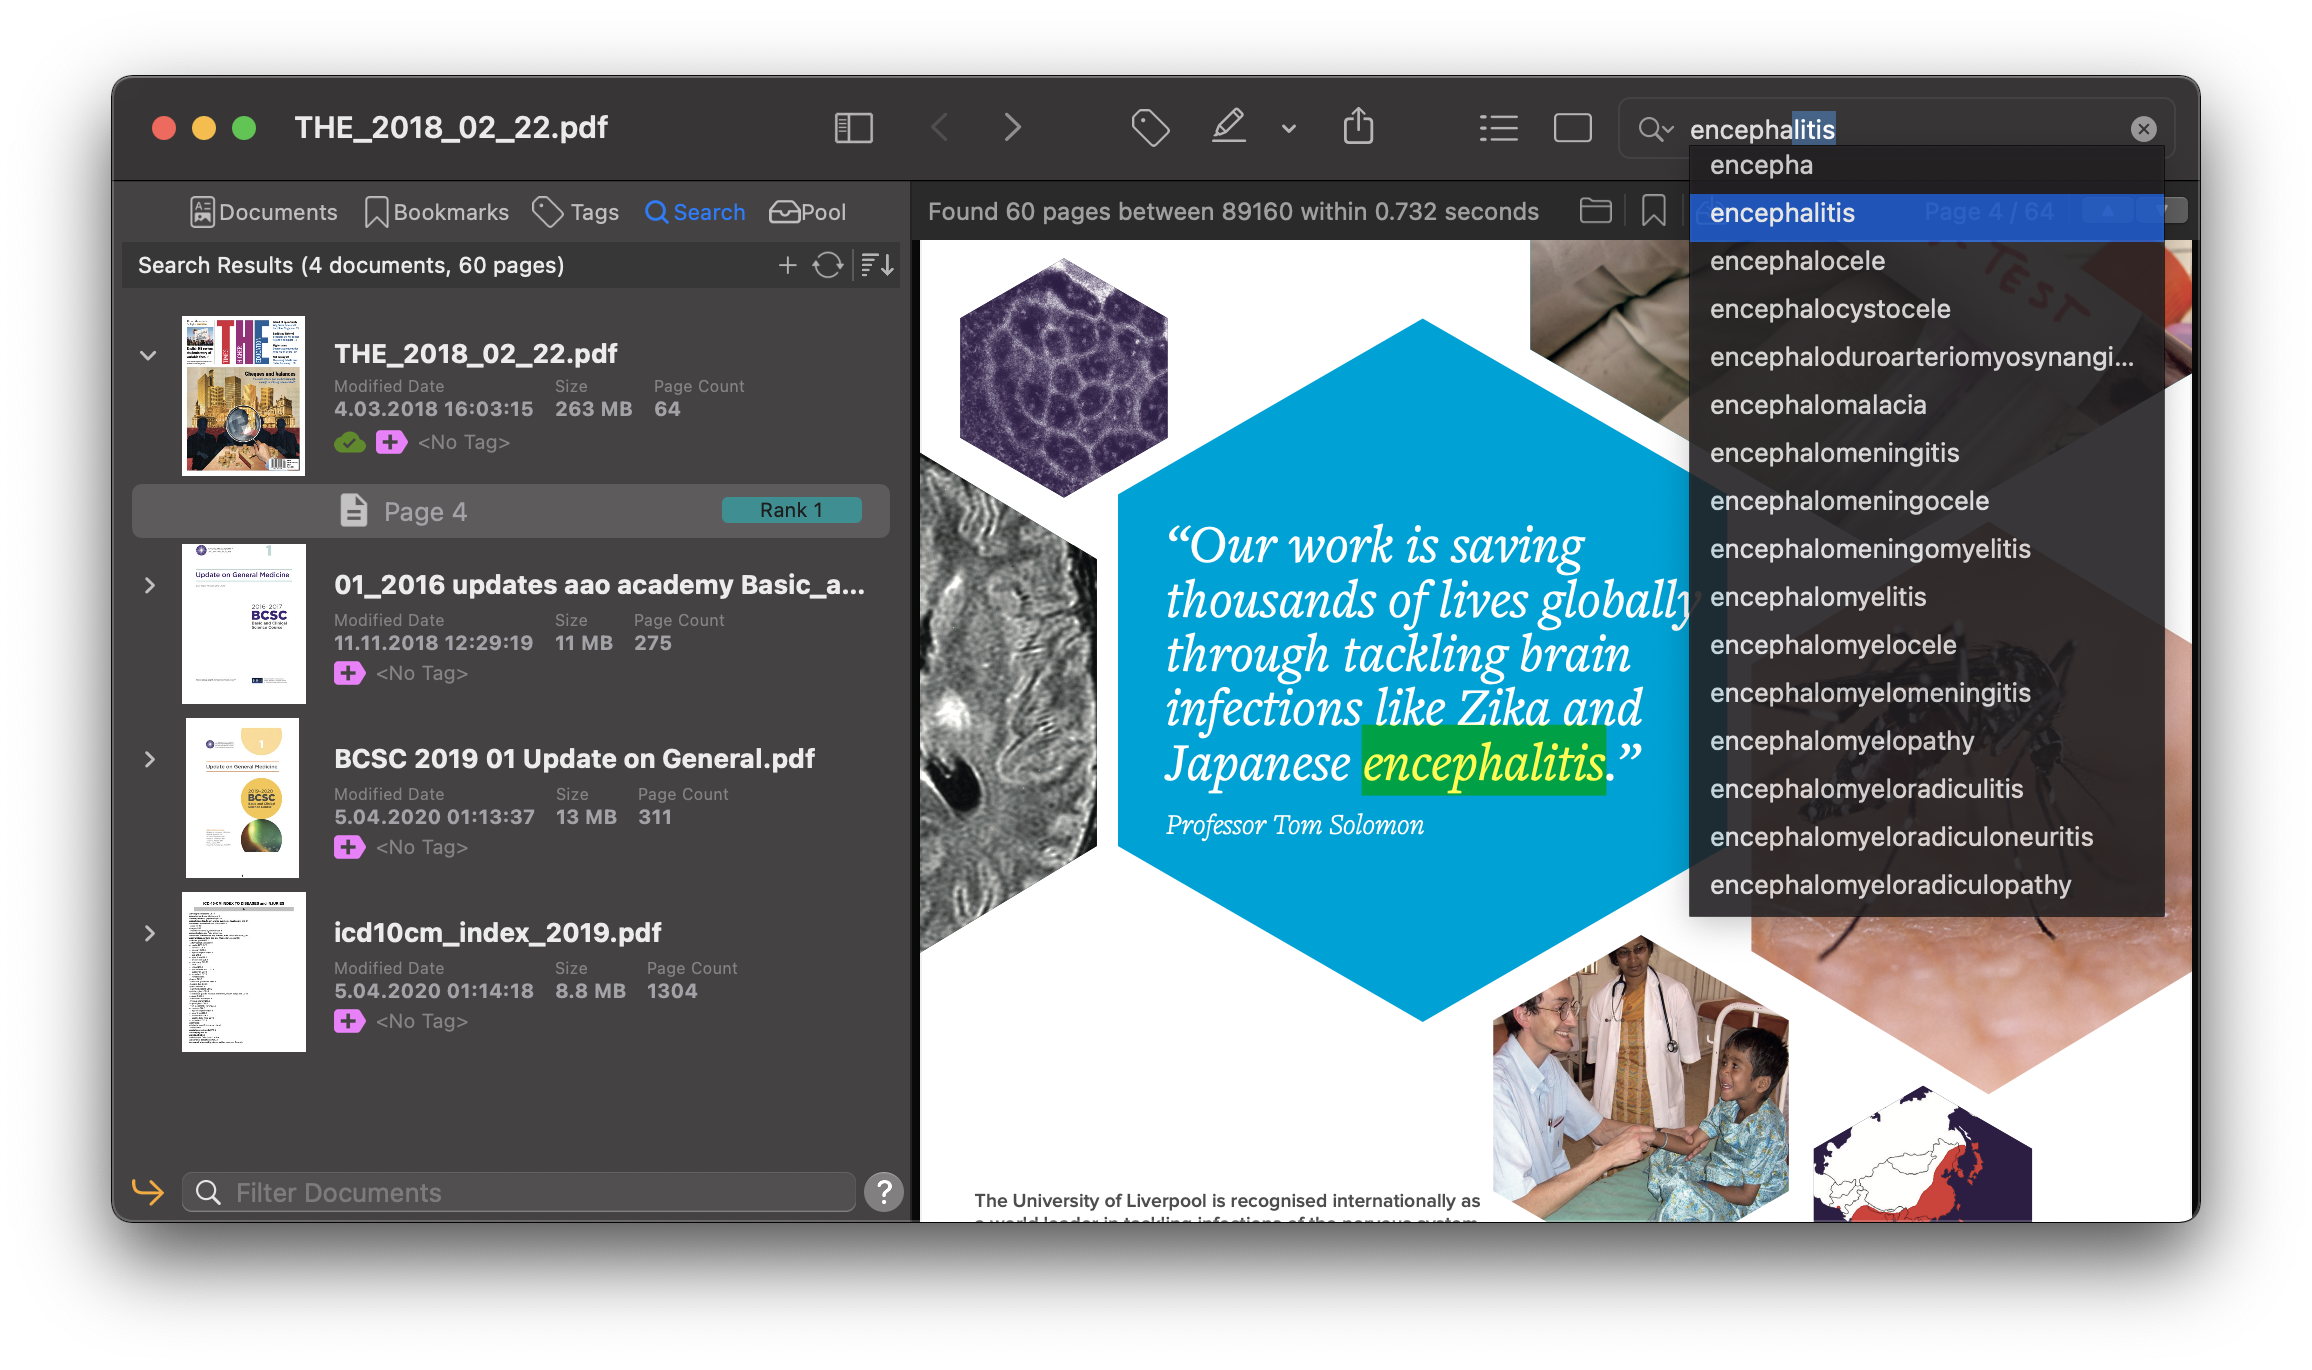
To search, simply type the keywords you want in the search box. When you enter text, the suggestion list will be updated dynamically. When you have completed the search term entry, press the "Enter" key to view documents containing the target search term. After selecting a suggestion from the list by pressing the enter key or clicking the mouse, you can continue typing another keyword or press enter a second time to start the search.
How Search Works
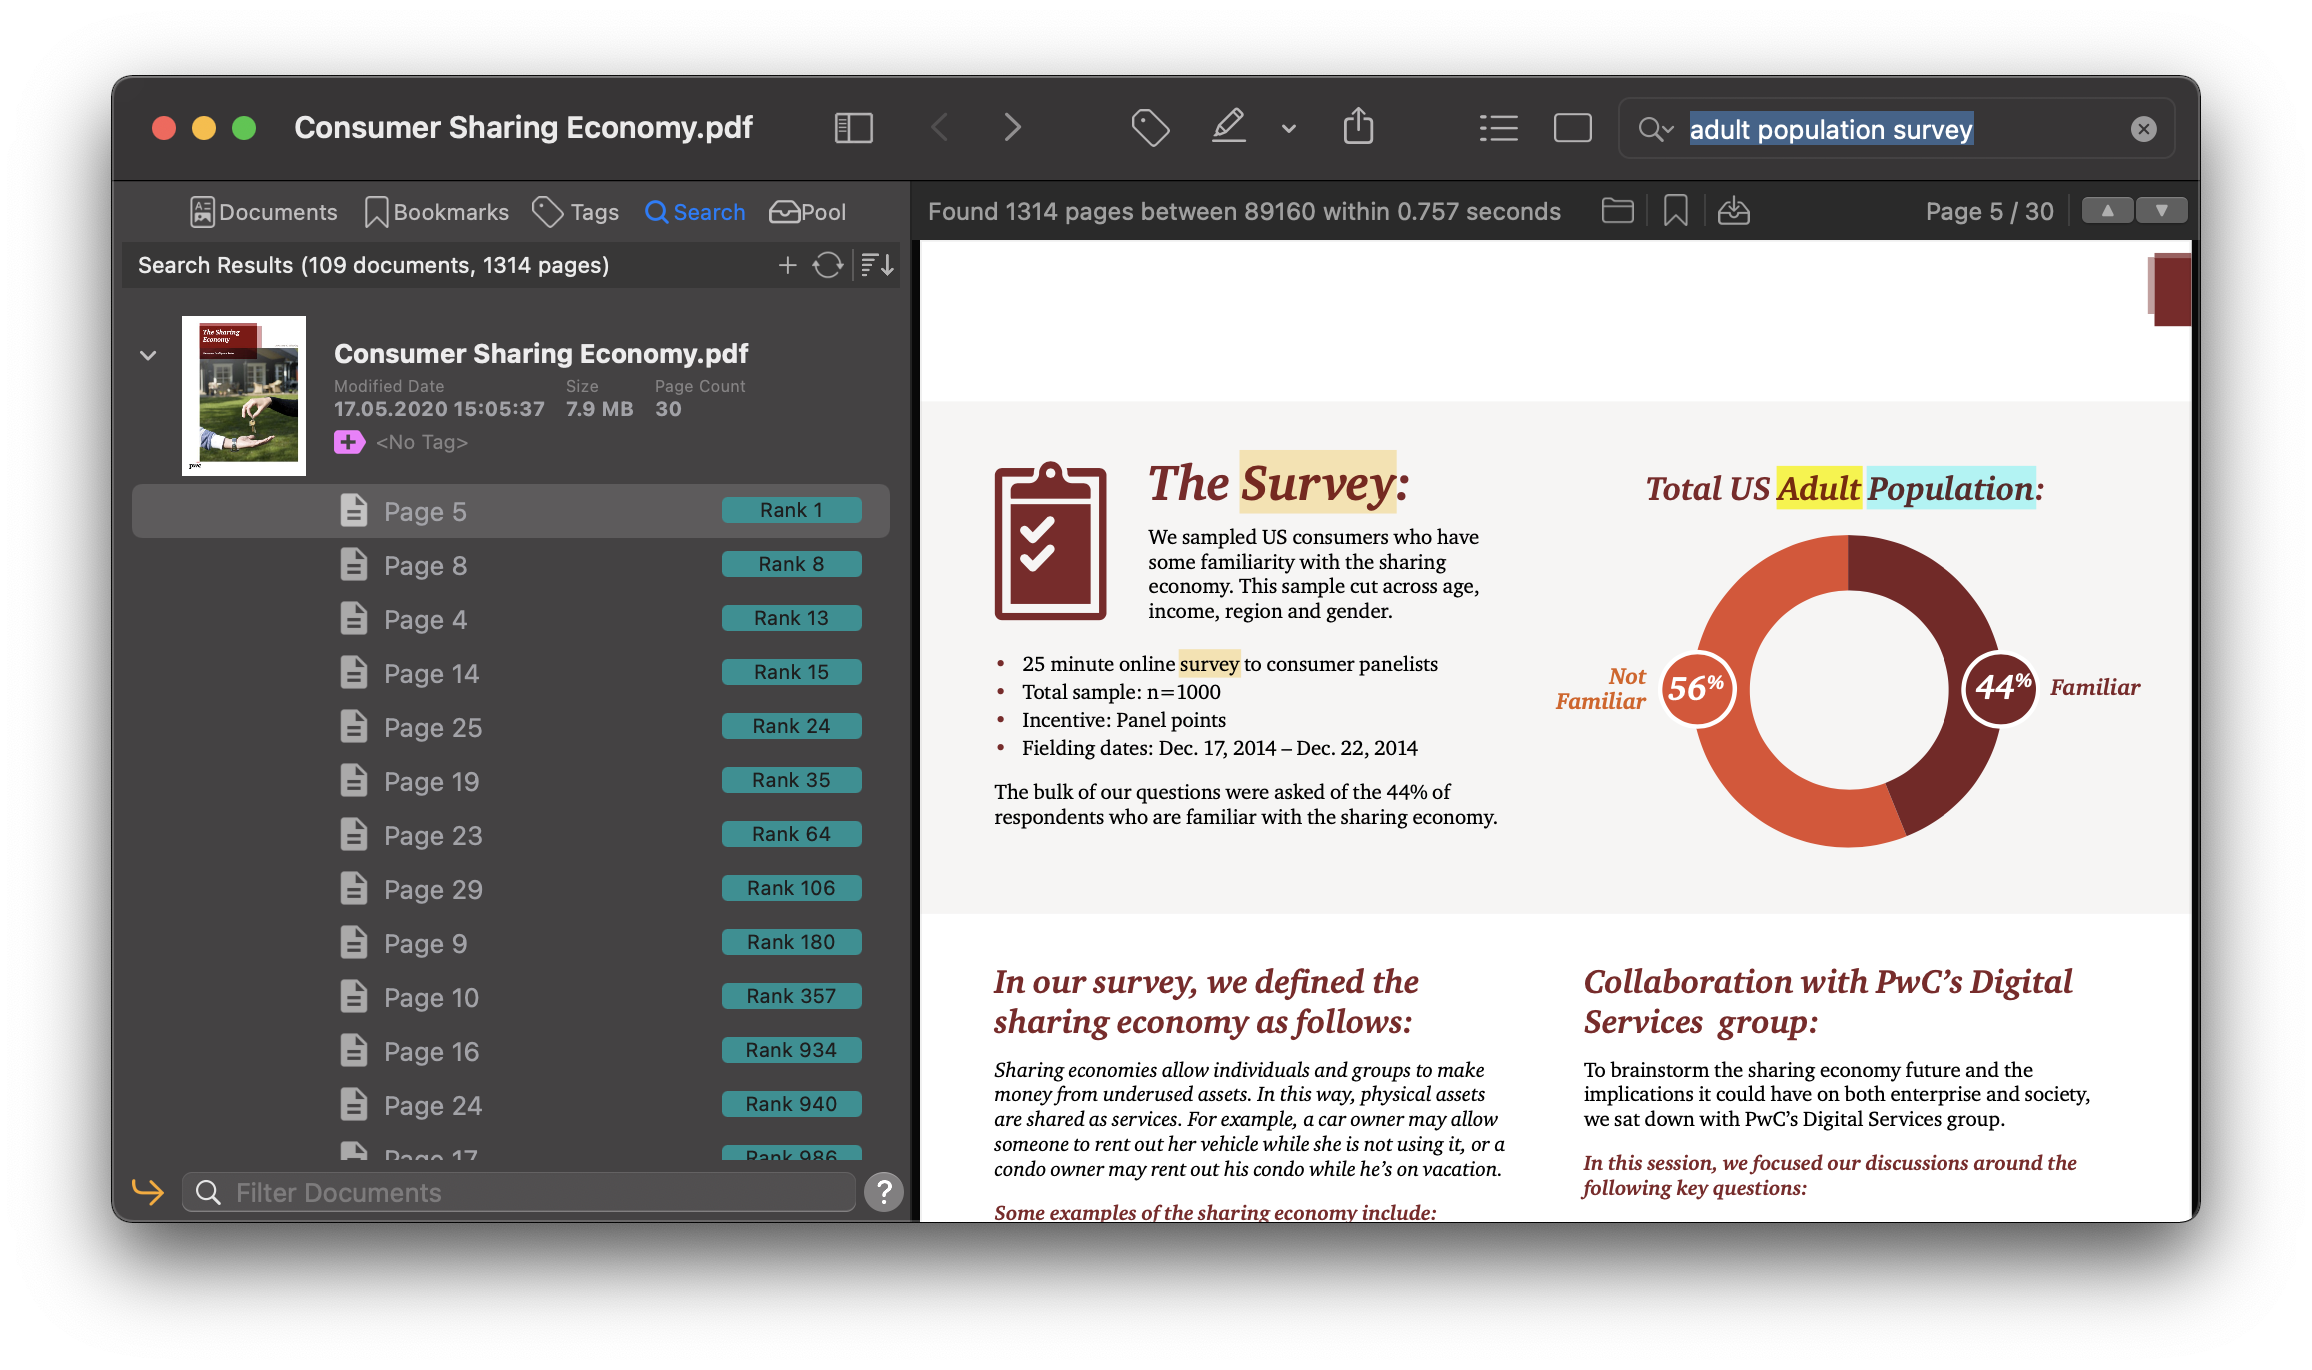
The PDF Search algorithm calculates a ranking value for each page in the documents based on the keywords you enter. These ranks are calculated as follows:
- Keyword Distance : Pages with keywords that are close to each other rank higher.
- Keyword Density : Pages with more keywords rank higher.
- Importance : Pages that contain keywords in the title or are created in bold or larger font will rank higher.
- Document Date: Pages from newer files rank higher than older files.
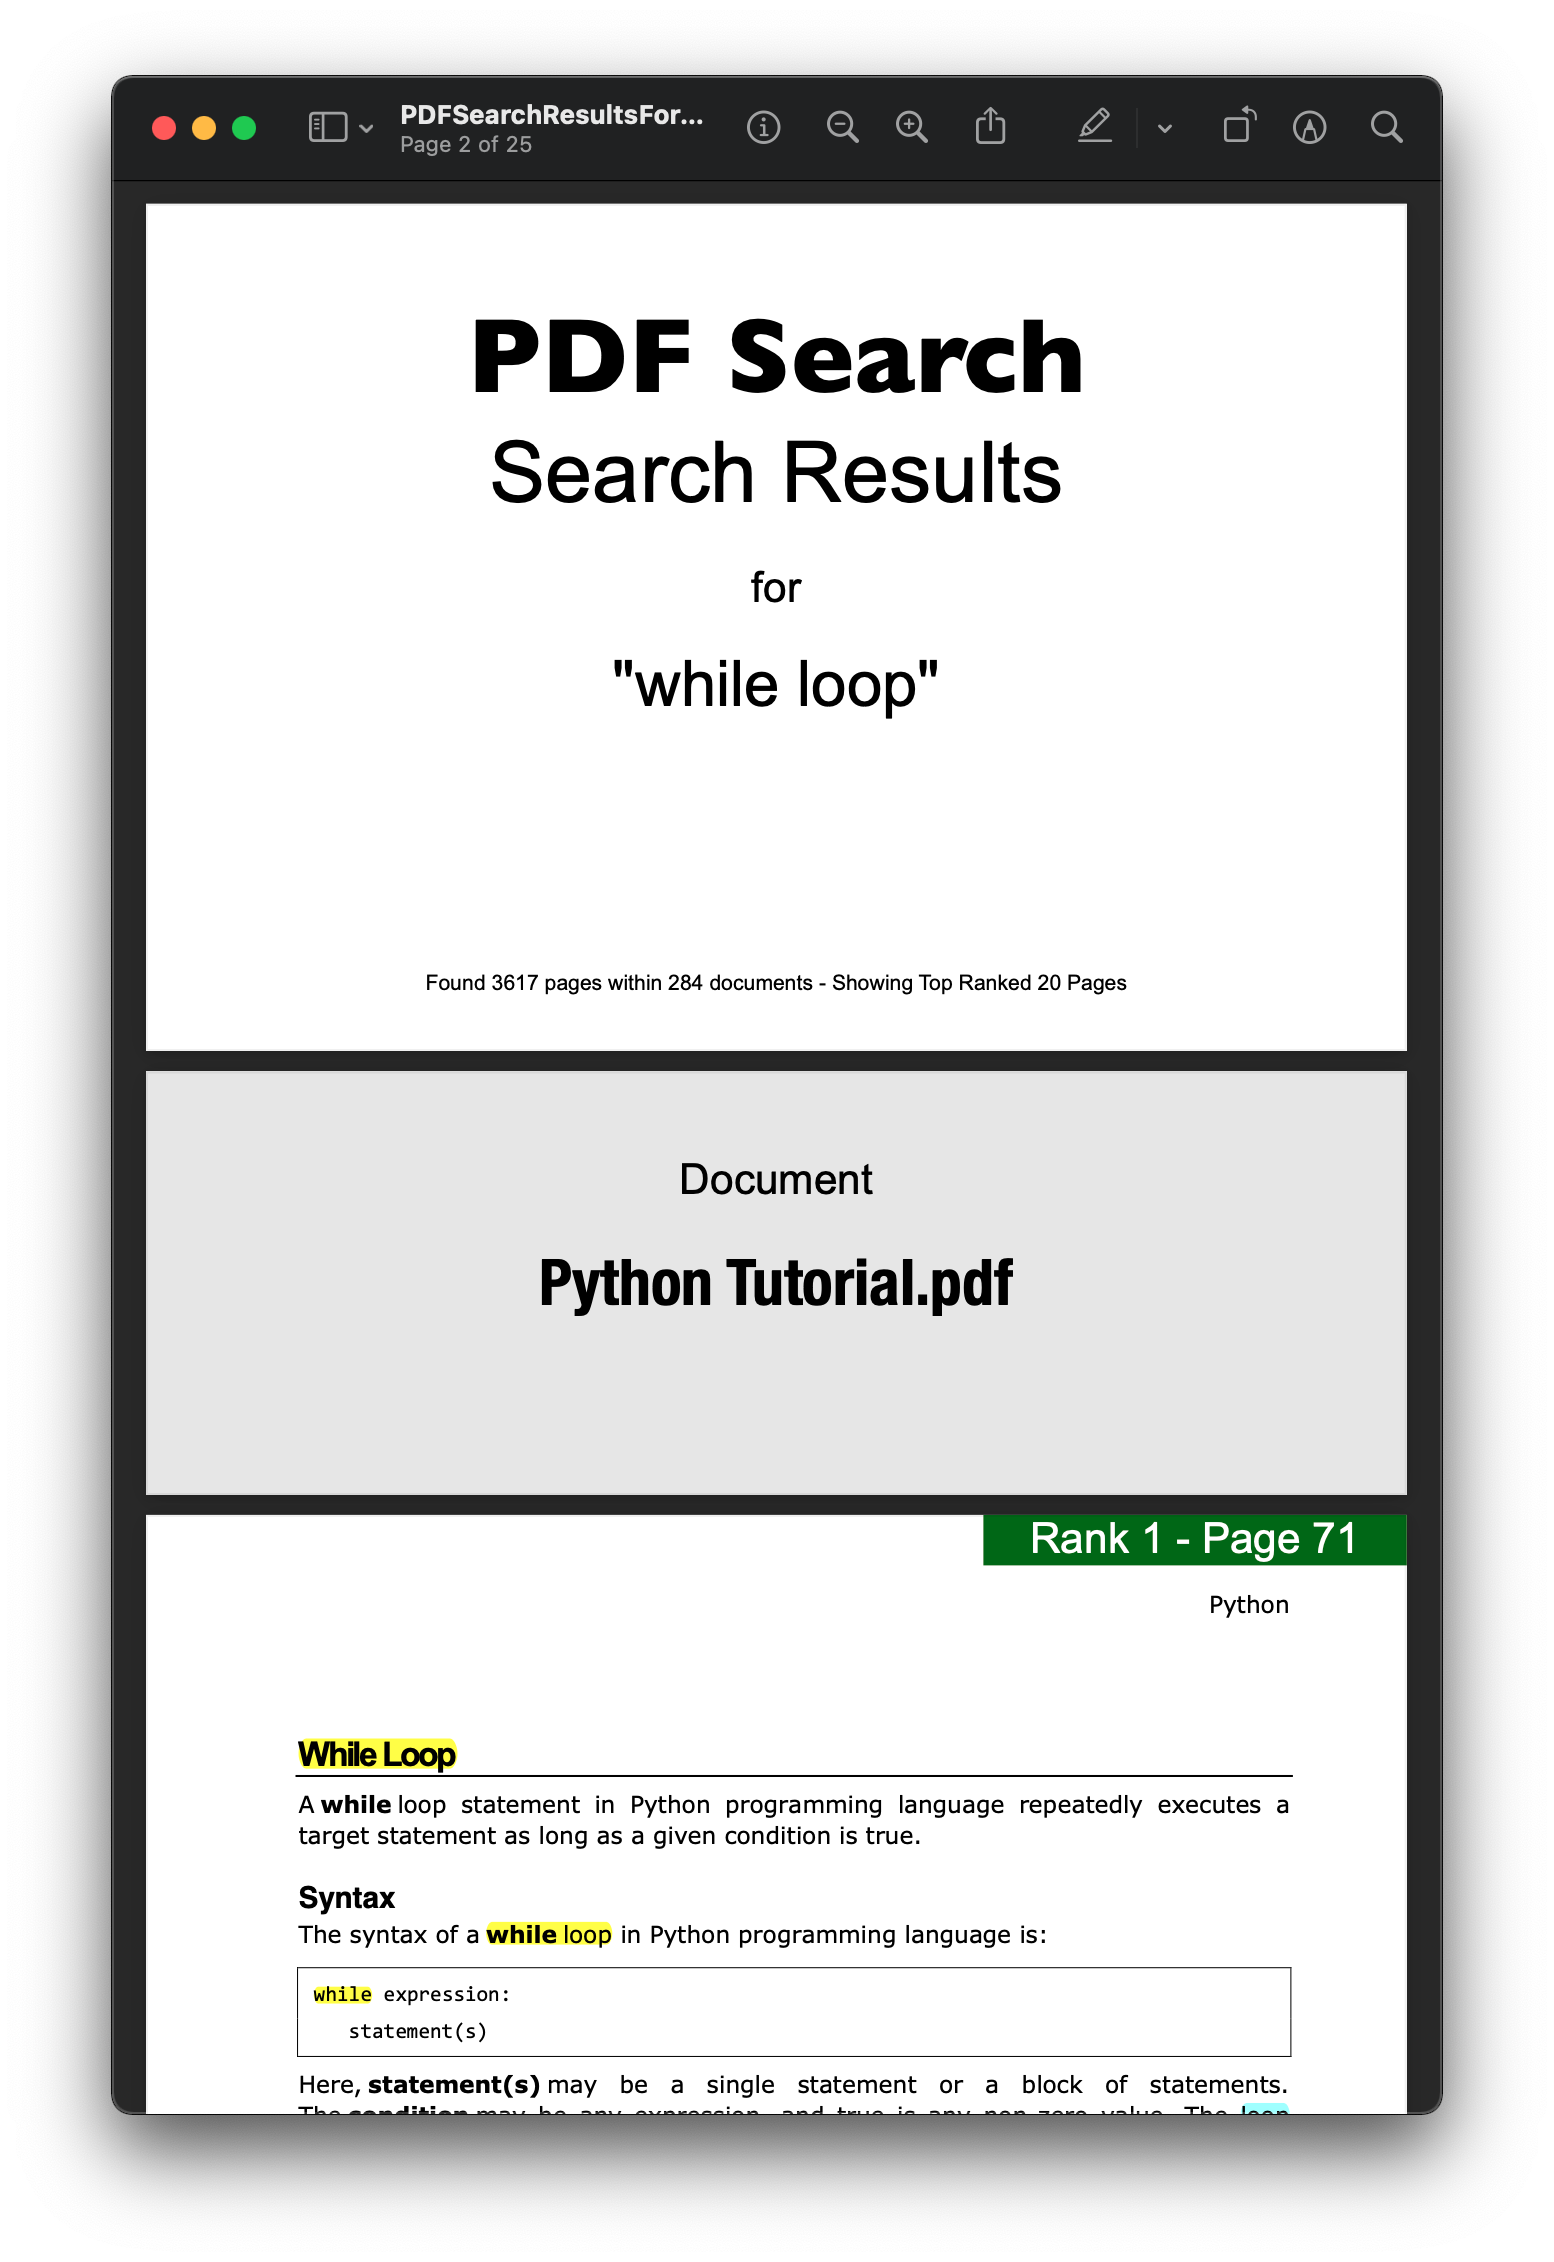
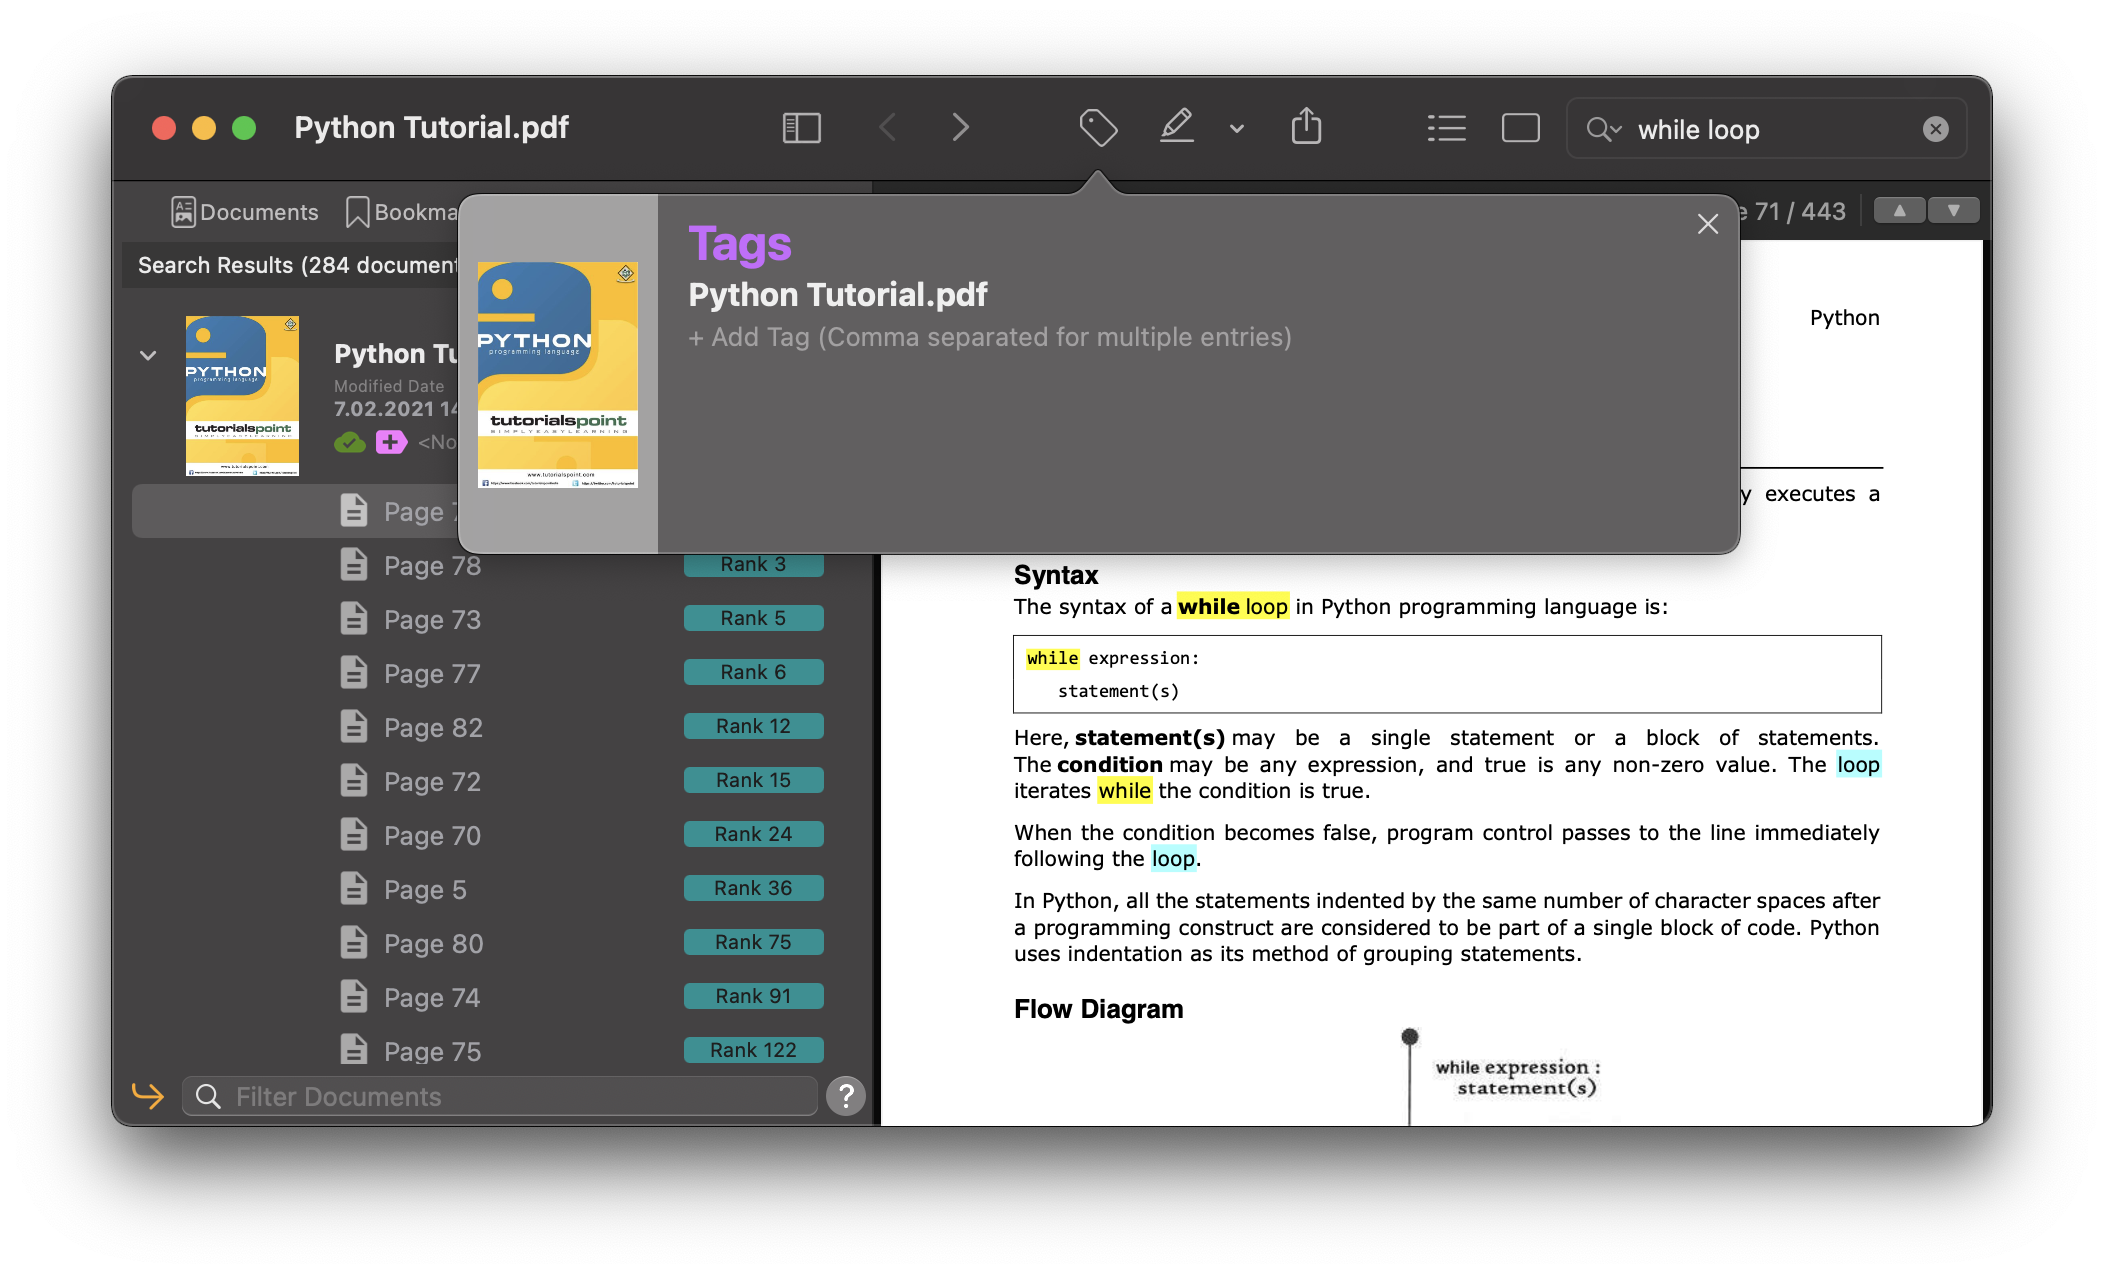
When a search is complete, PDF Search displays the highest ranking page, highlighting keywords by color.
Search Patterns
You can use below operators for advanced search capabilities
- Quotes "..."
- Plus Sign (+)
- Minus Sign (-)
- Wildcard (*)
When you search using quotation marks, it only finds pages that contain the exact keywords in quotation marks.
| Search Keyword | Result |
|---|---|
| It will only show pages that contain exactly the same keywords together, such as "advanced economies". | |
| Shows pages with 'advanced' or 'economies' keywords, sorting them separately by relevance. It will list pages containing only one of the two words. However, it shows the pages where both words occur at the same time in the top rankings. |
If you put plus (+) sign before a keyword, resulting pages will always contain that keyword.
| Search Keyword | Result |
|---|---|
| Pages that do not contain the keyword 'economies' will not appear in the results list. |
If you put a minus (-) sign in front of a keyword, pages containing that keyword will be excluded from the search results.
| Search Keyword | Result |
|---|---|
| Pages containing the keyword 'Economies' will not be in the results list. |
You can use the asterisk character to search for keywords that start or end with certain characters.
| Search Keyword | Result |
|---|---|
| A search will be made for keywords starting with 'econom', such as 'economy, economies, econometric, economic, etc...'. | |
| Keywords ending with 'ty' such as 'quality, productivity, equality, security, etc...' will be searched. | |
| A search will be made for keywords starting with 'pr' and ending with 't' such as 'product, present, president, project, etc...'. |
Filter Documents
You can filter documents to tell you which documents to search. PDF Search supports 3 types of filtering for documents.
Folder Based Filtering
You can navigate between root folders and subfolders by double-clicking on them. After opening a subfolder, the search scope is automatically told to that folder. When you search, only documents under that folder are searched.
Filter By Path
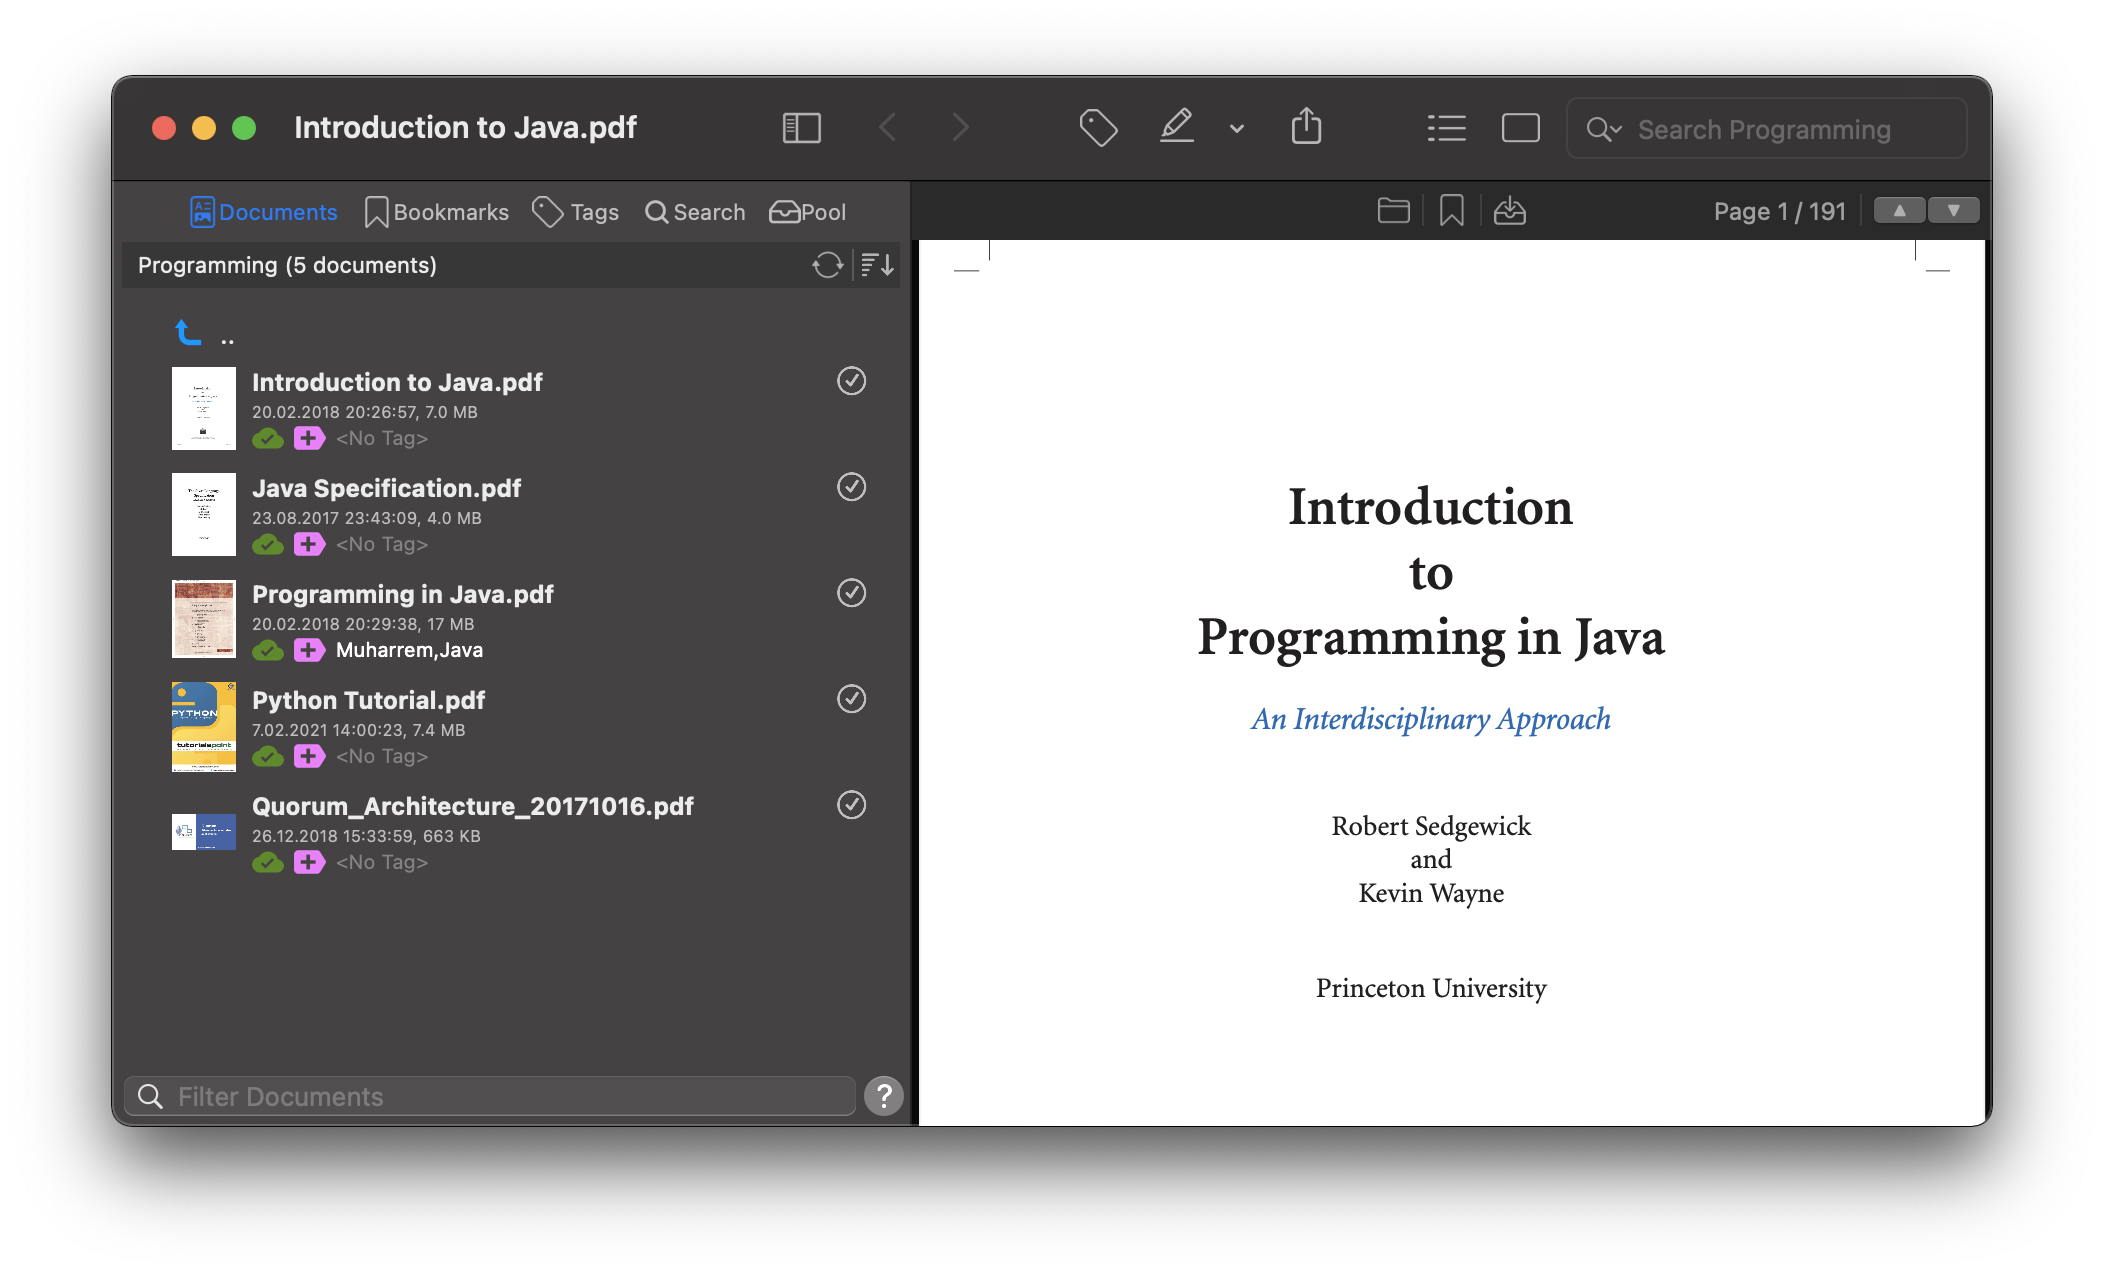
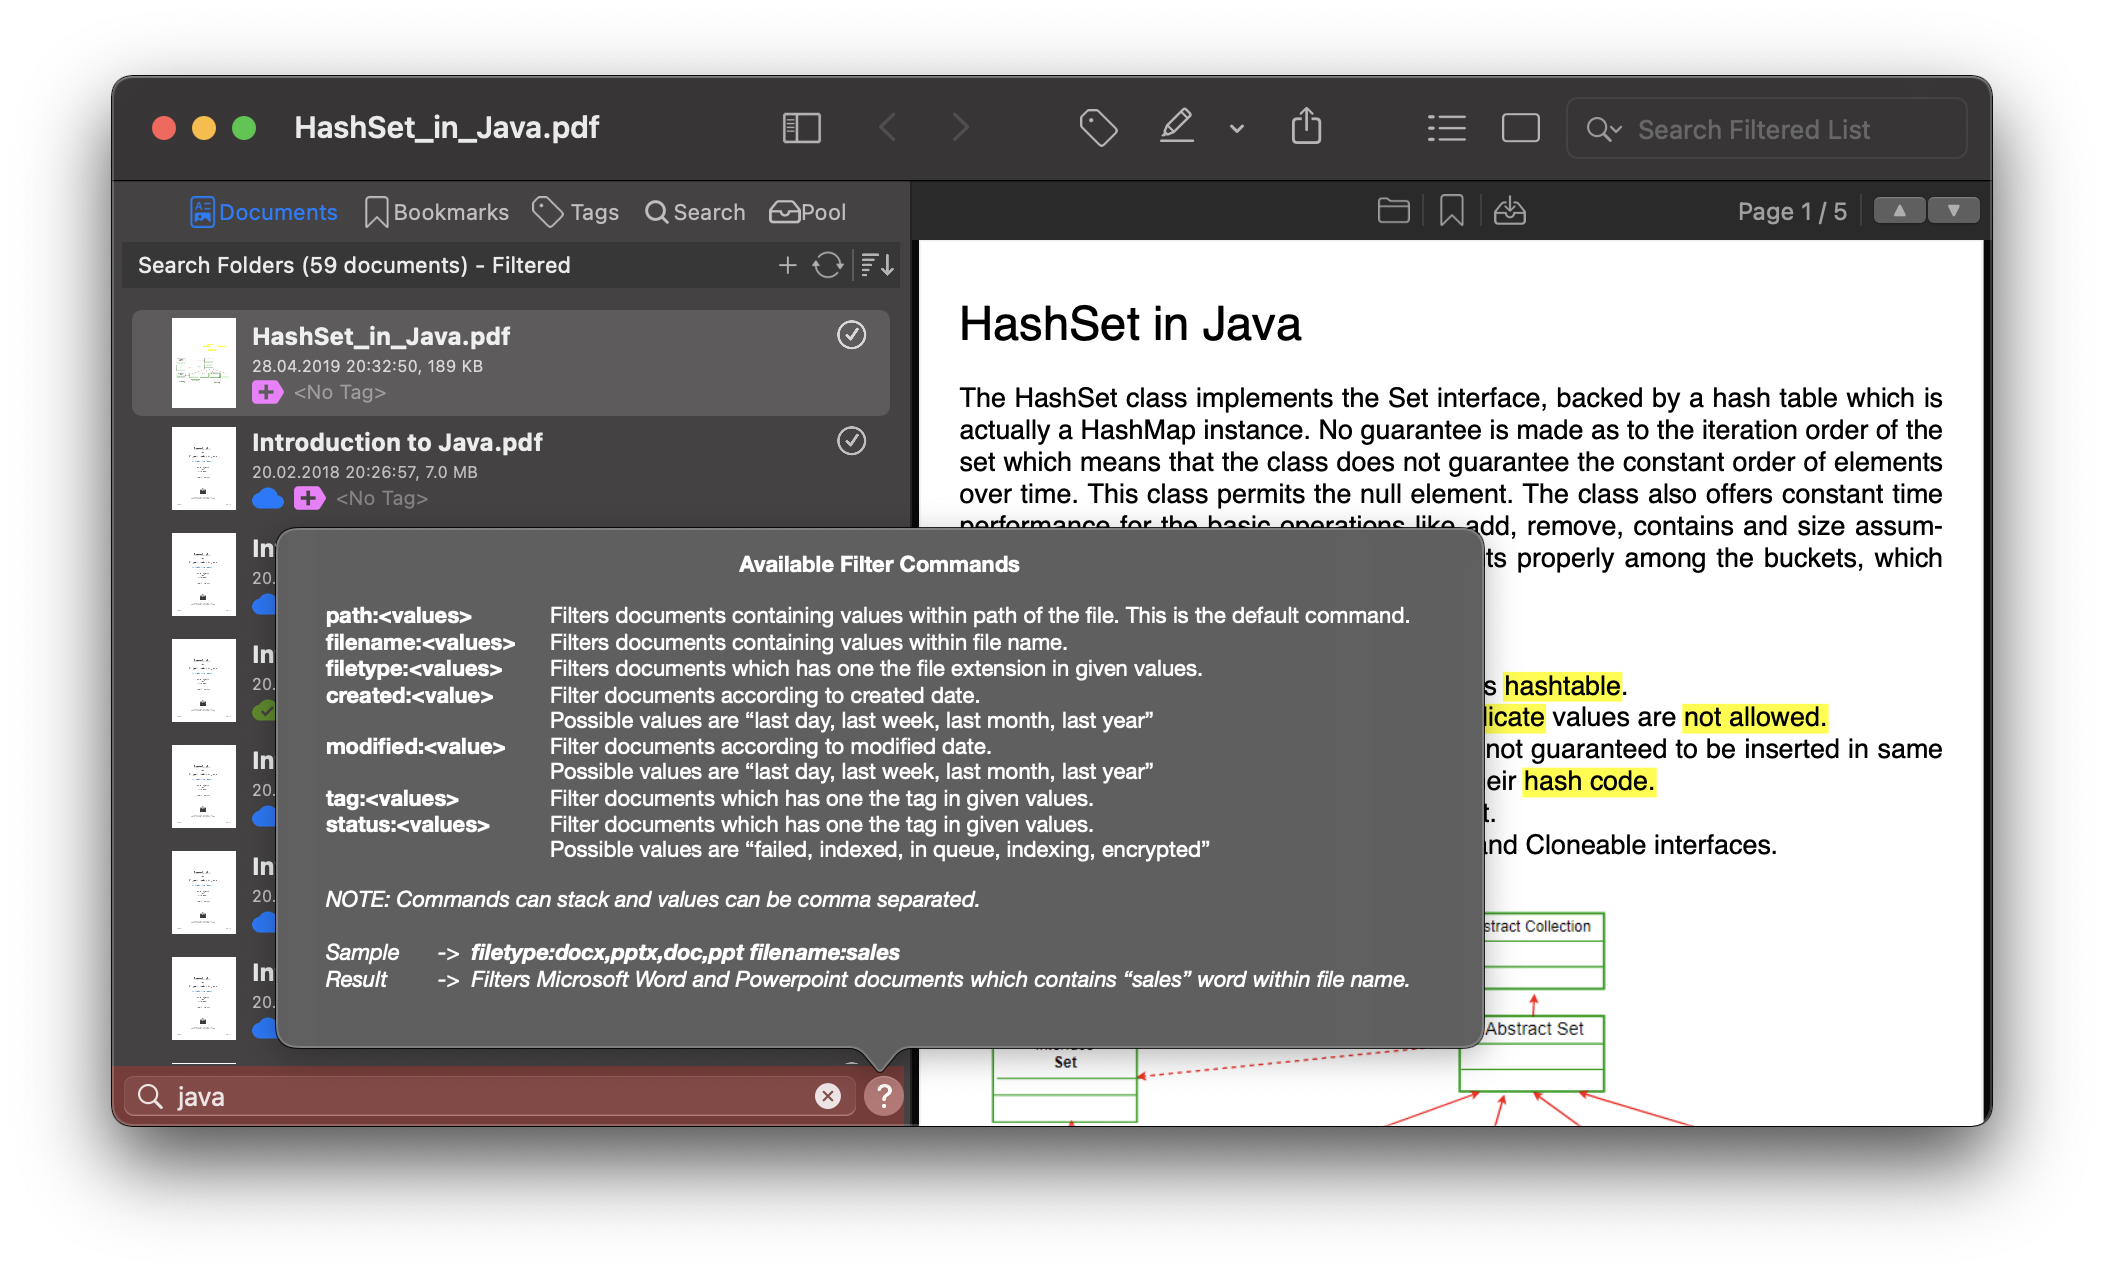
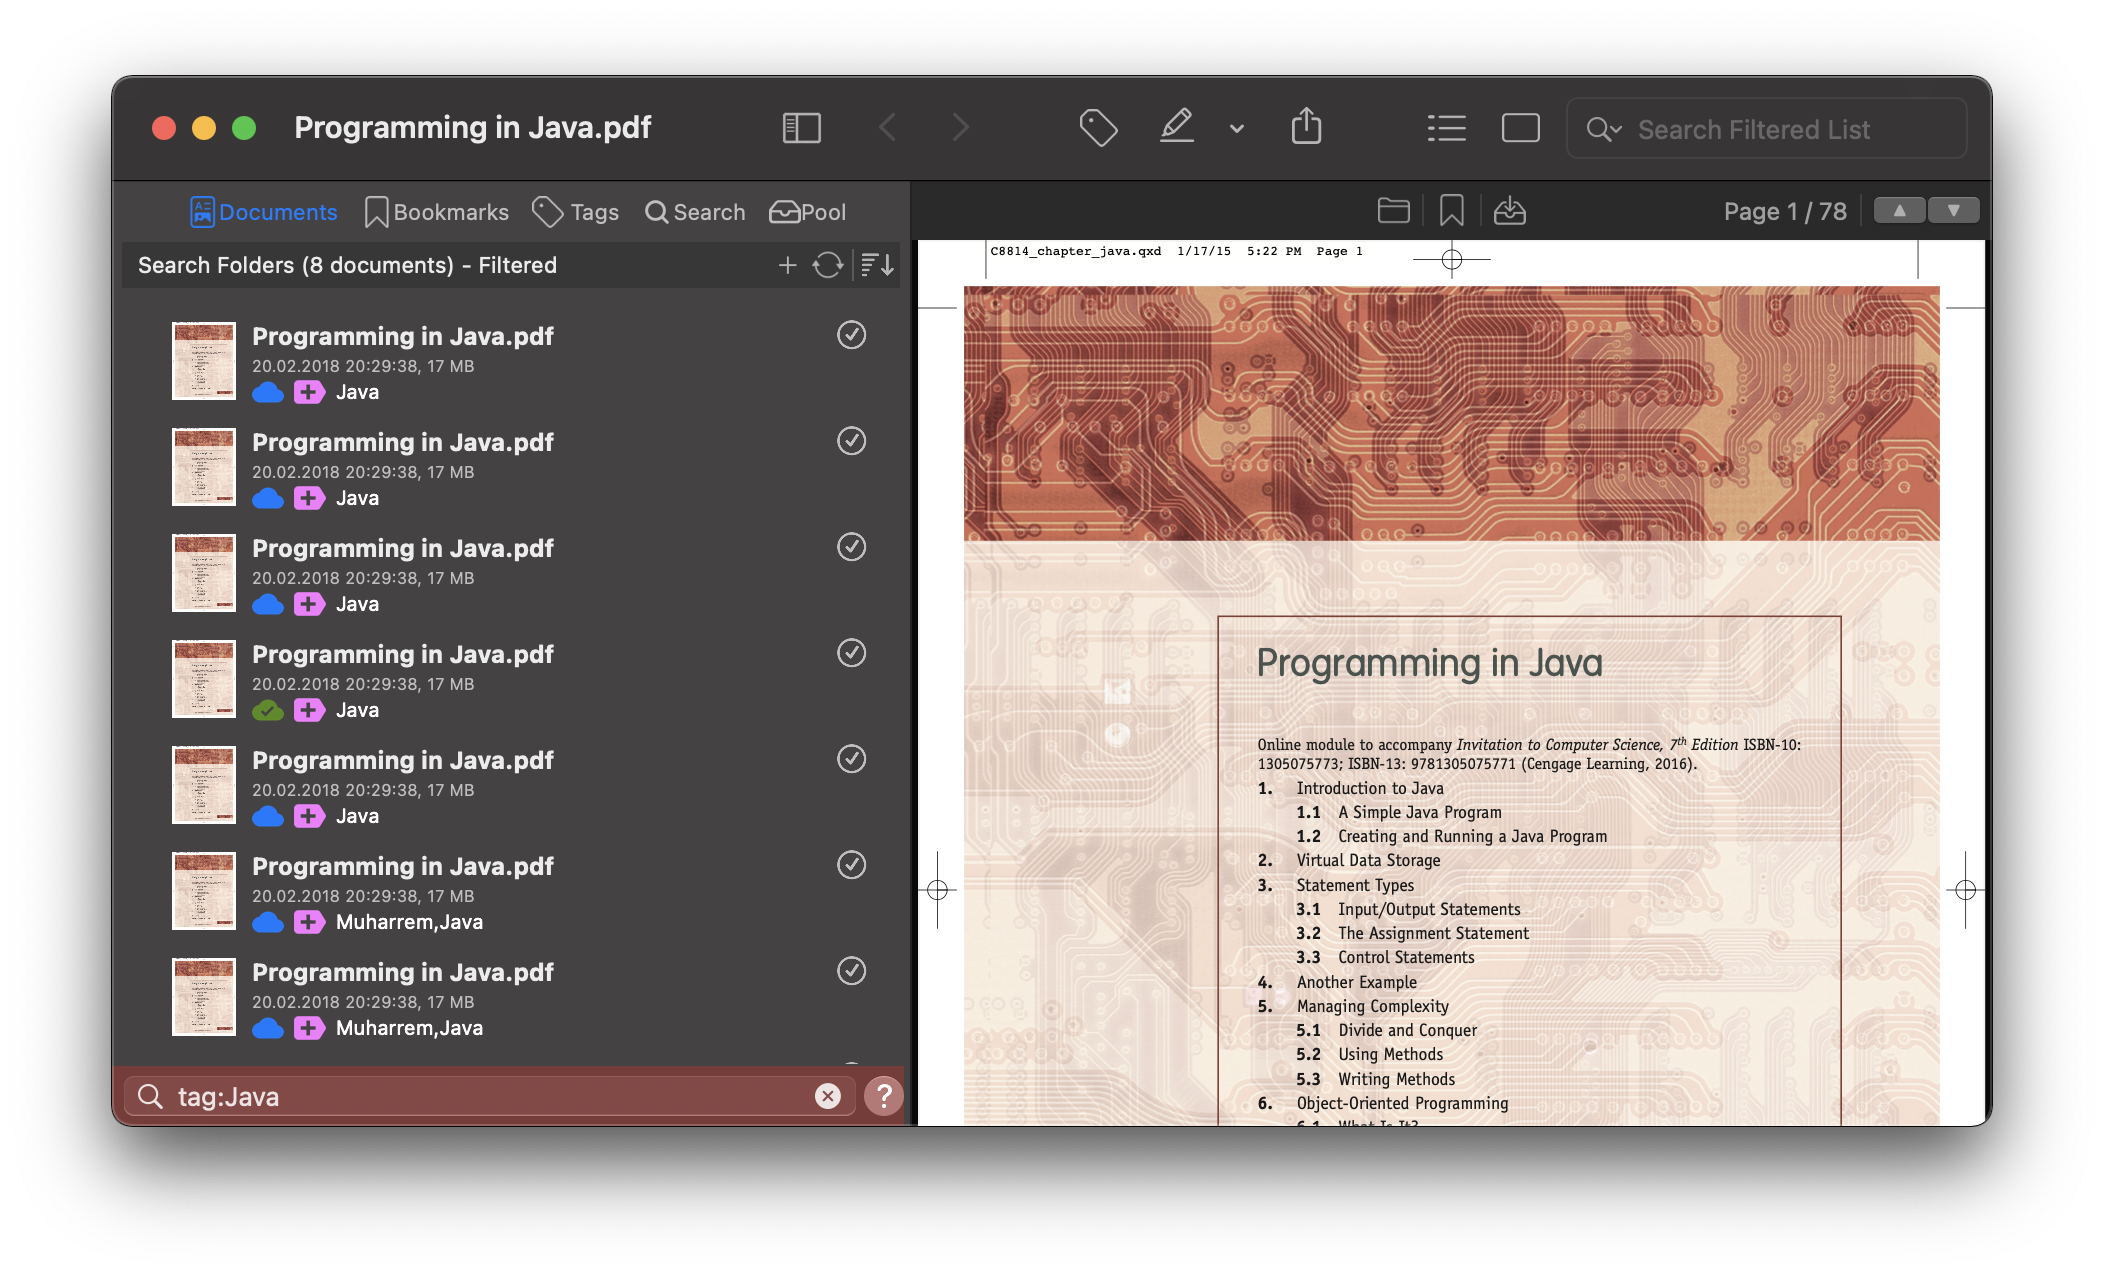
The box in the lower left corner of the Documents window is used to filter documents. You can filter documents by location path, including filename. For example, you have java documents and they contain the keyword 'java' in the filename. When you type "java" in this field and hit enter, all documents under the active folder will be checked if their path contains the keyword "java". Then, a search will be made through this list.
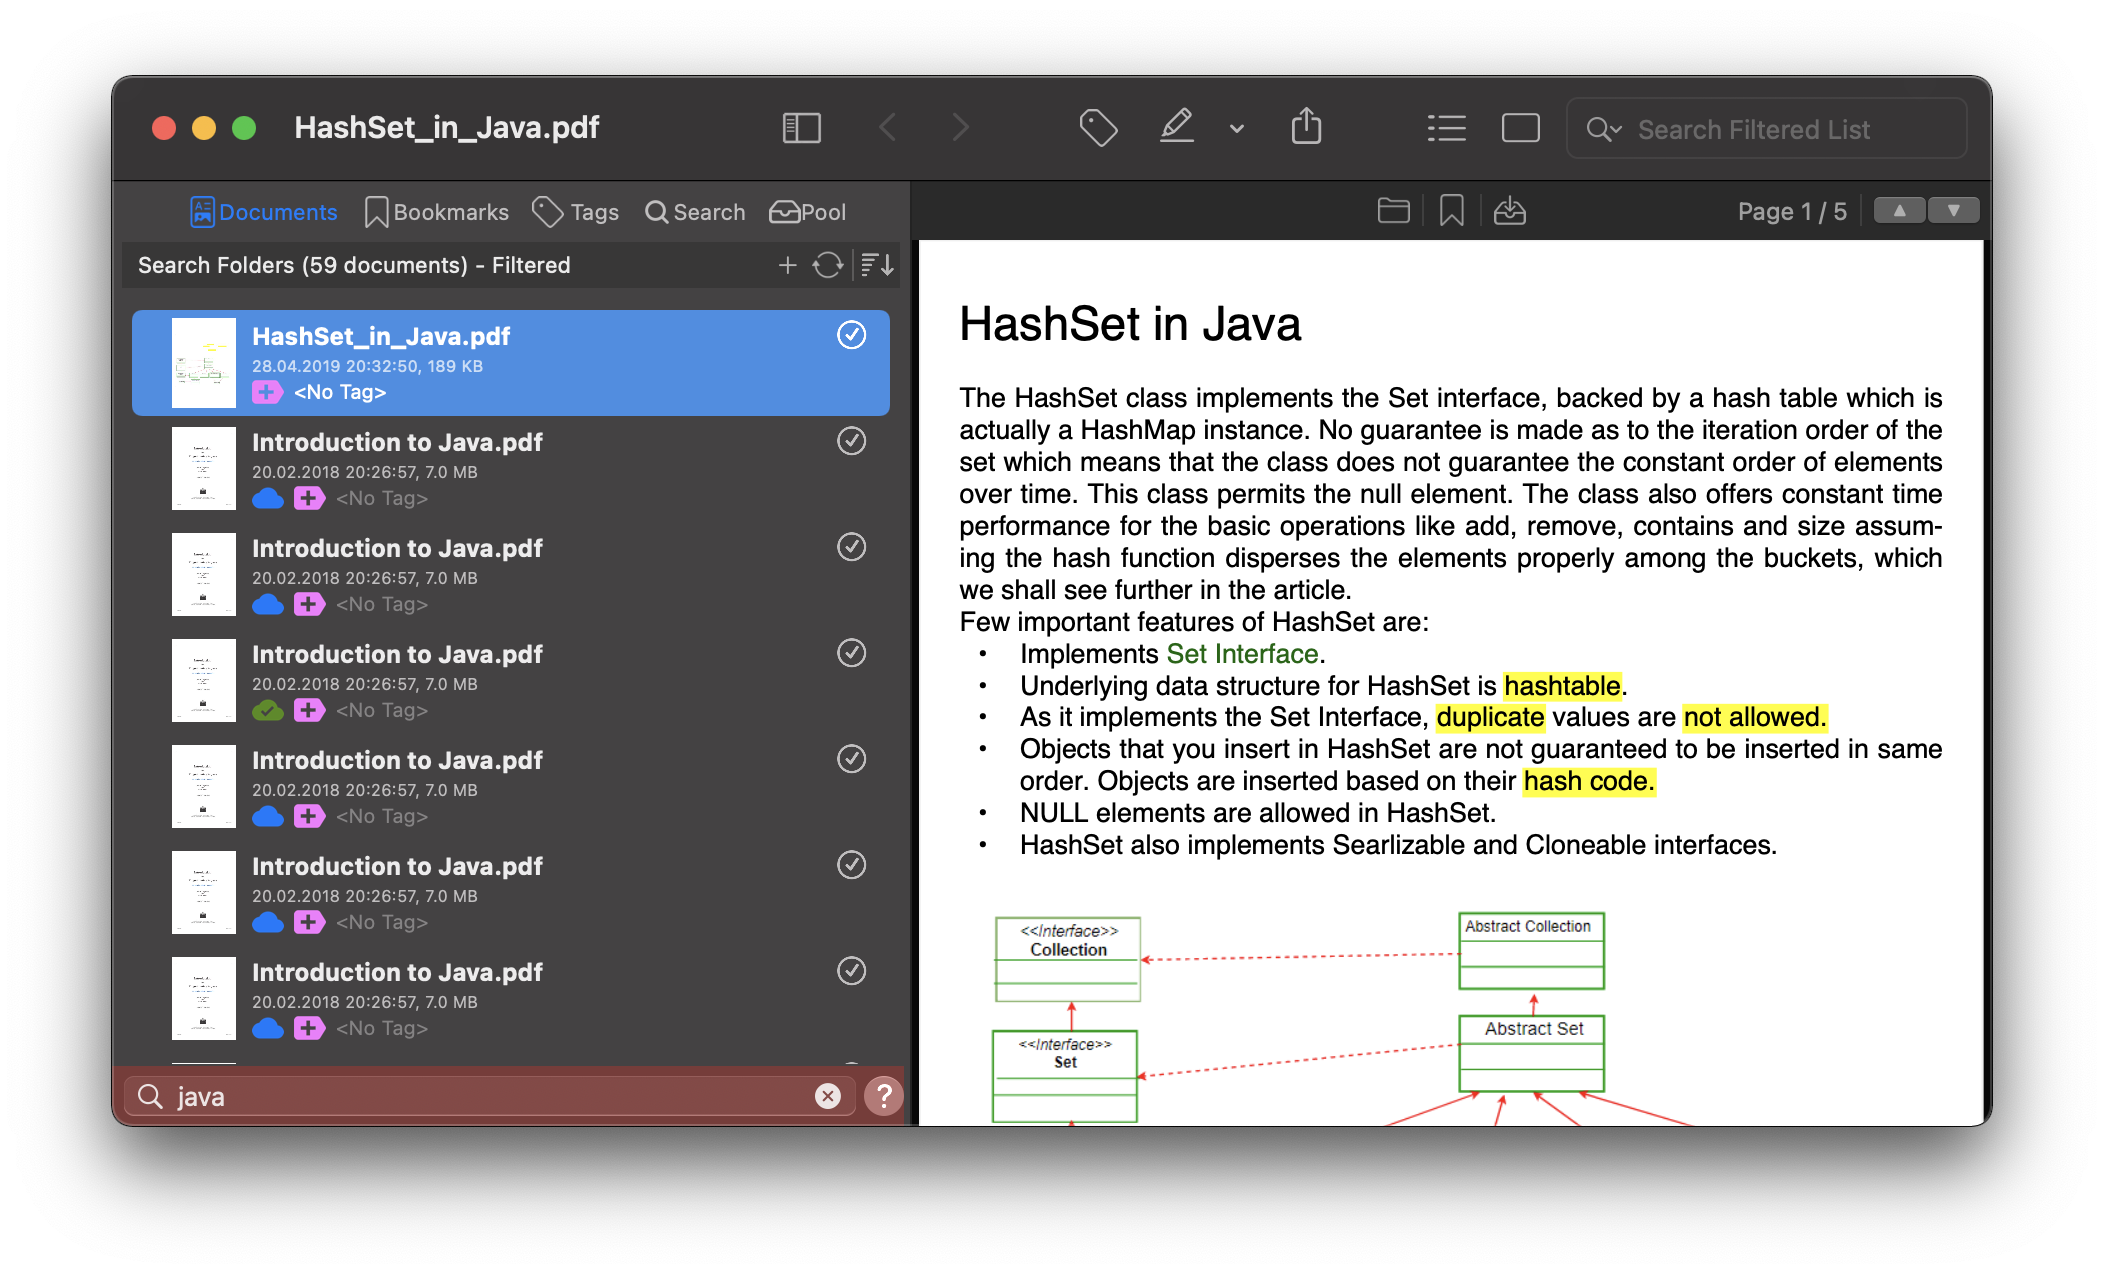
In addition, you can use advanced filtering features. You can filter by document type, creation or modification date, and tag information. You can see the advanced filtering commands by clicking the question mark button next to the box.
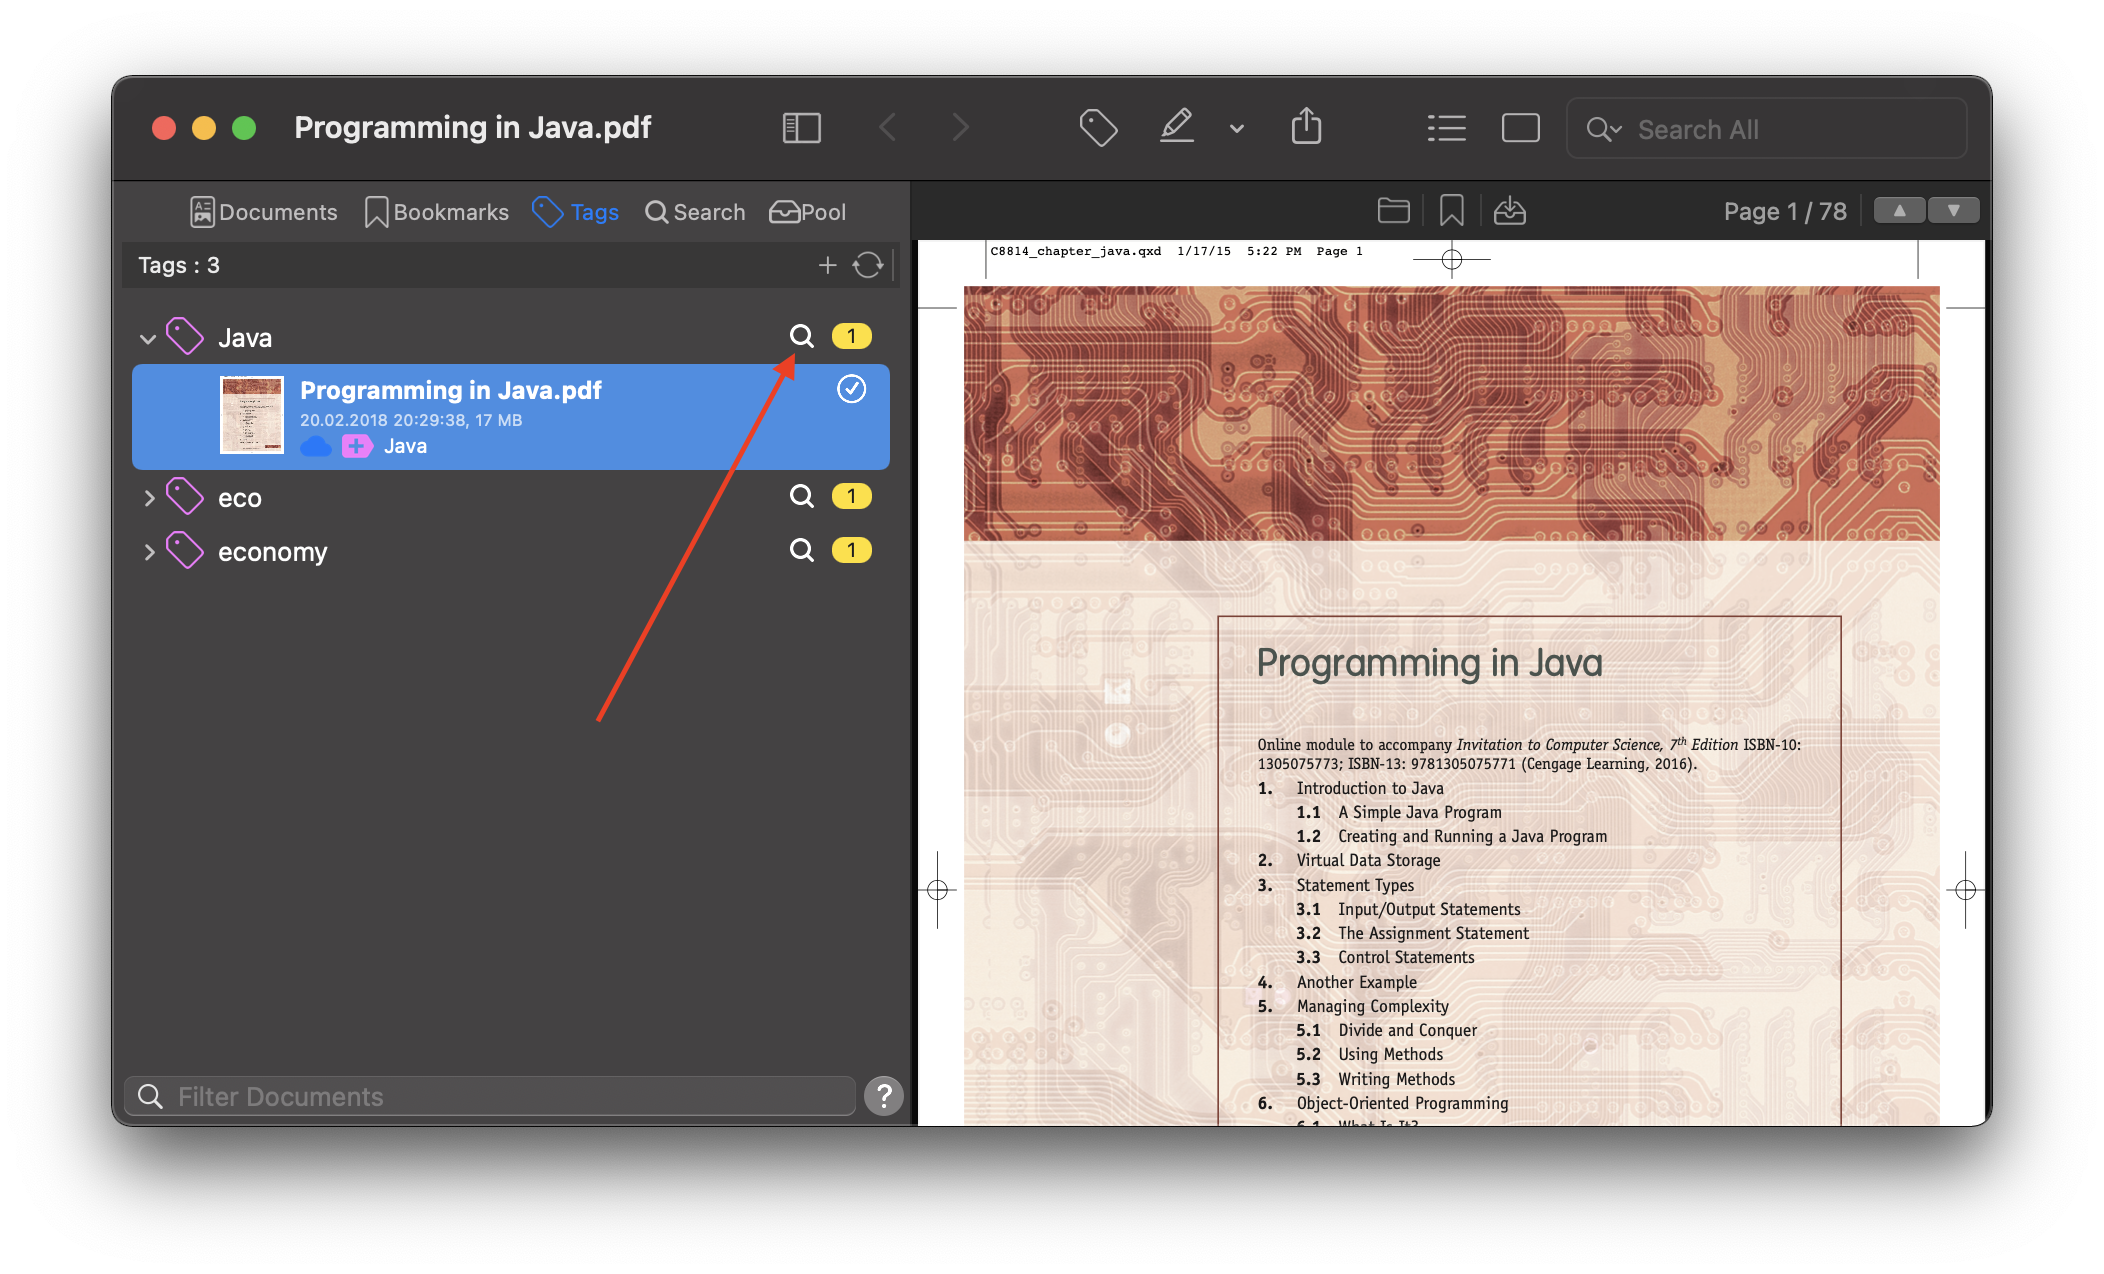
Filter By Tag
You can filter documents by tag name using the filtering field or using the Tags tab in the left sidebar.
Export Search Results
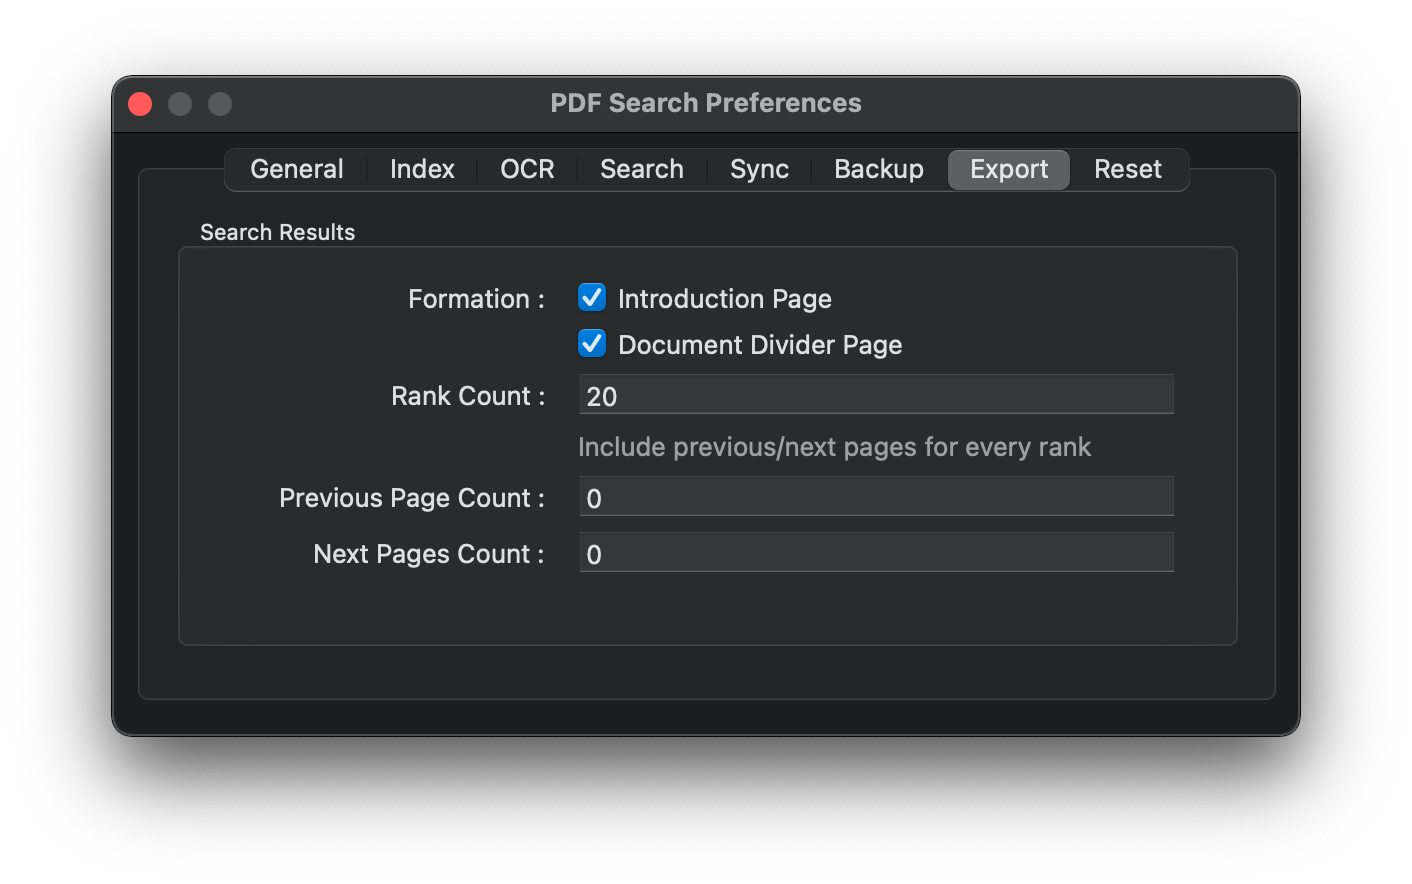
After searching, you can export the search results as a new PDF document. To export, use the share button on the toolbar and select "Export Search Results".
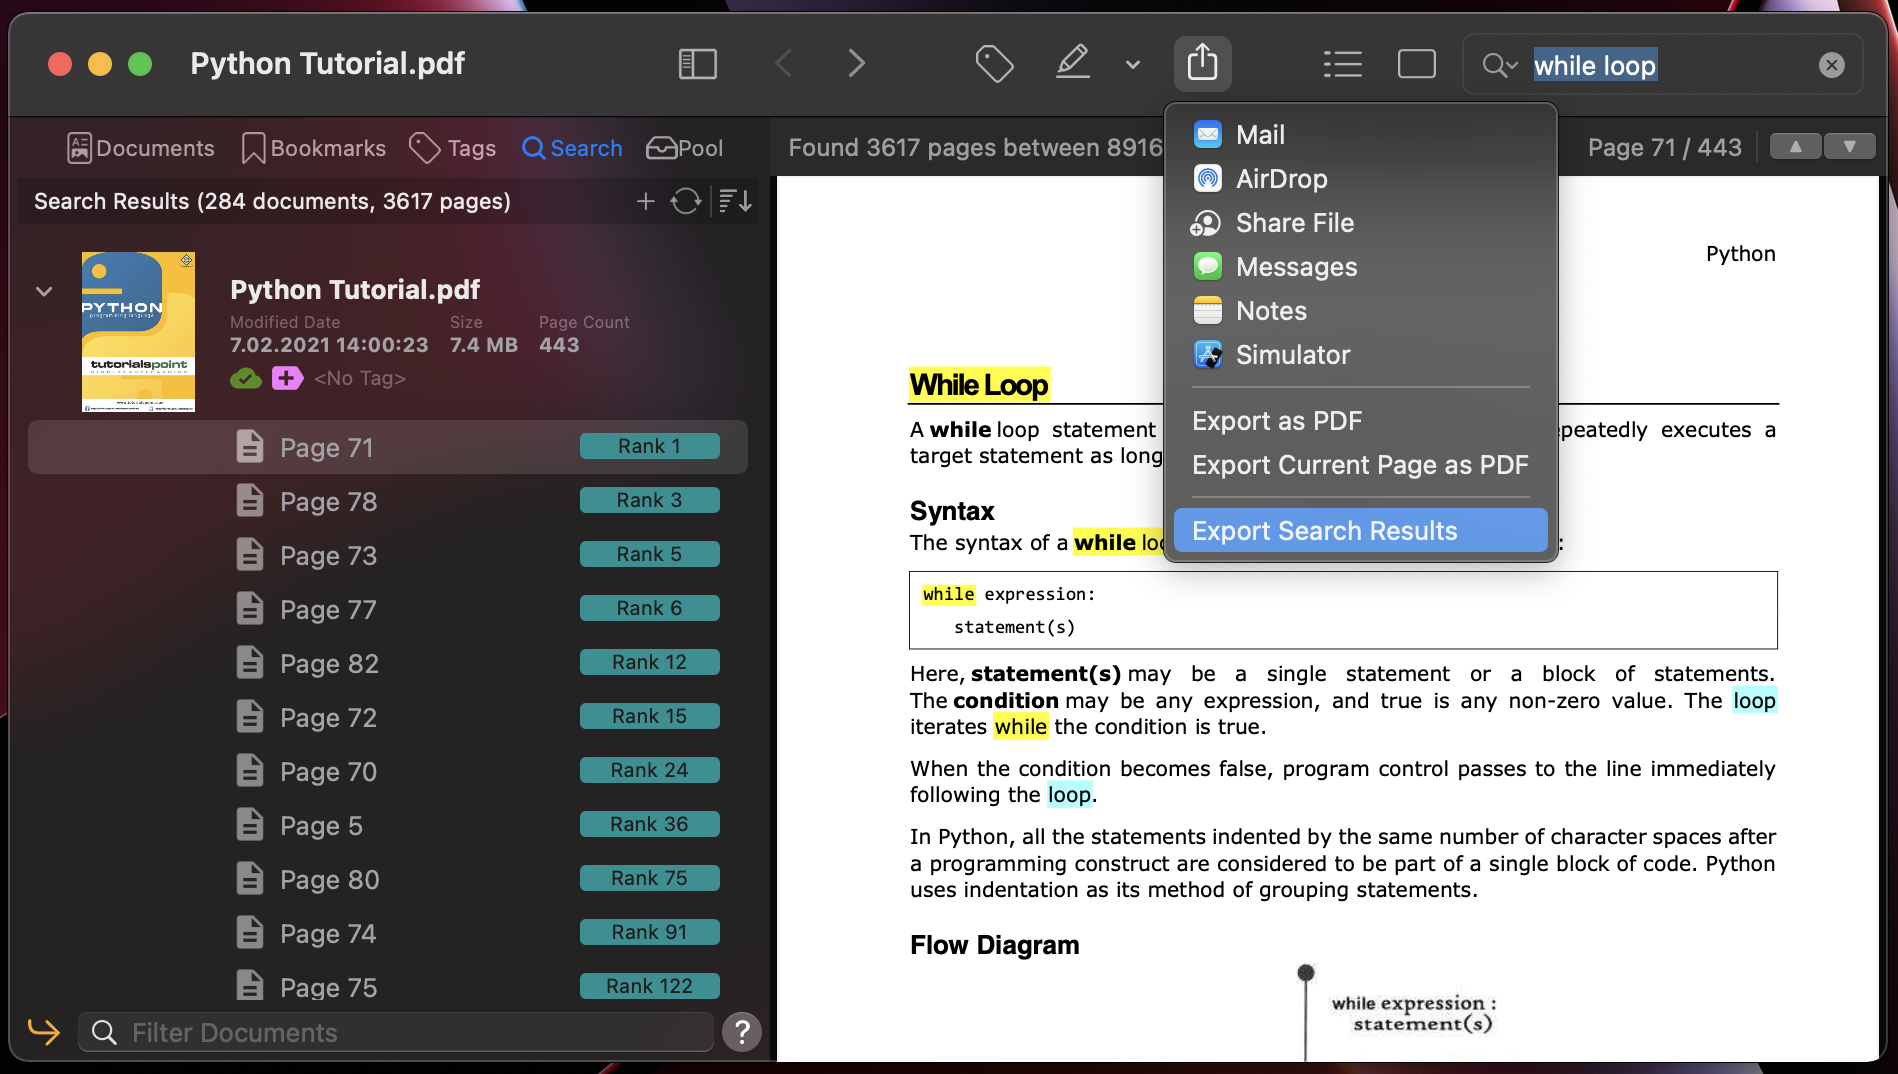
Exporting the search result will create a new PDF document. This document will contain all the best relevant pages from different documents sorted by rank. You can customize the export process using the Preferences Window.
Tags
You can tag documents to group them under a single tag. You can then easily find or search for these tagged documents. Tag information is shared between iOS and macOS devices via iCloud drive. So, when you change a tag on a device, it will automatically sync with other devices if iCloud Drive is enabled.
Tag a document
You can use the tag button in the toolbar or in the document list to tag a document. After pressing the tag button a popup will appear. Enter the tag name you want in this popup and hit enter.
Remove a tag
You can use the same popup to delete a tag from the document. Just open the tag popup and then click on the tag you want to delete.
Navigate Tags
Use the Tags tab in the sidebar to navigate through all tags. You can also use the search button next to the tag to search for documents under that tag.
Bookmarks
You can bookmark the document pages. This will allow you to easily find a page.
Add a bookmark to document
Use the bookmark button on the toolbar to add a bookmark for the active open page. You can add a note to the bookmark. These notes will be added to the page data and will be searchable while the document is being searched.
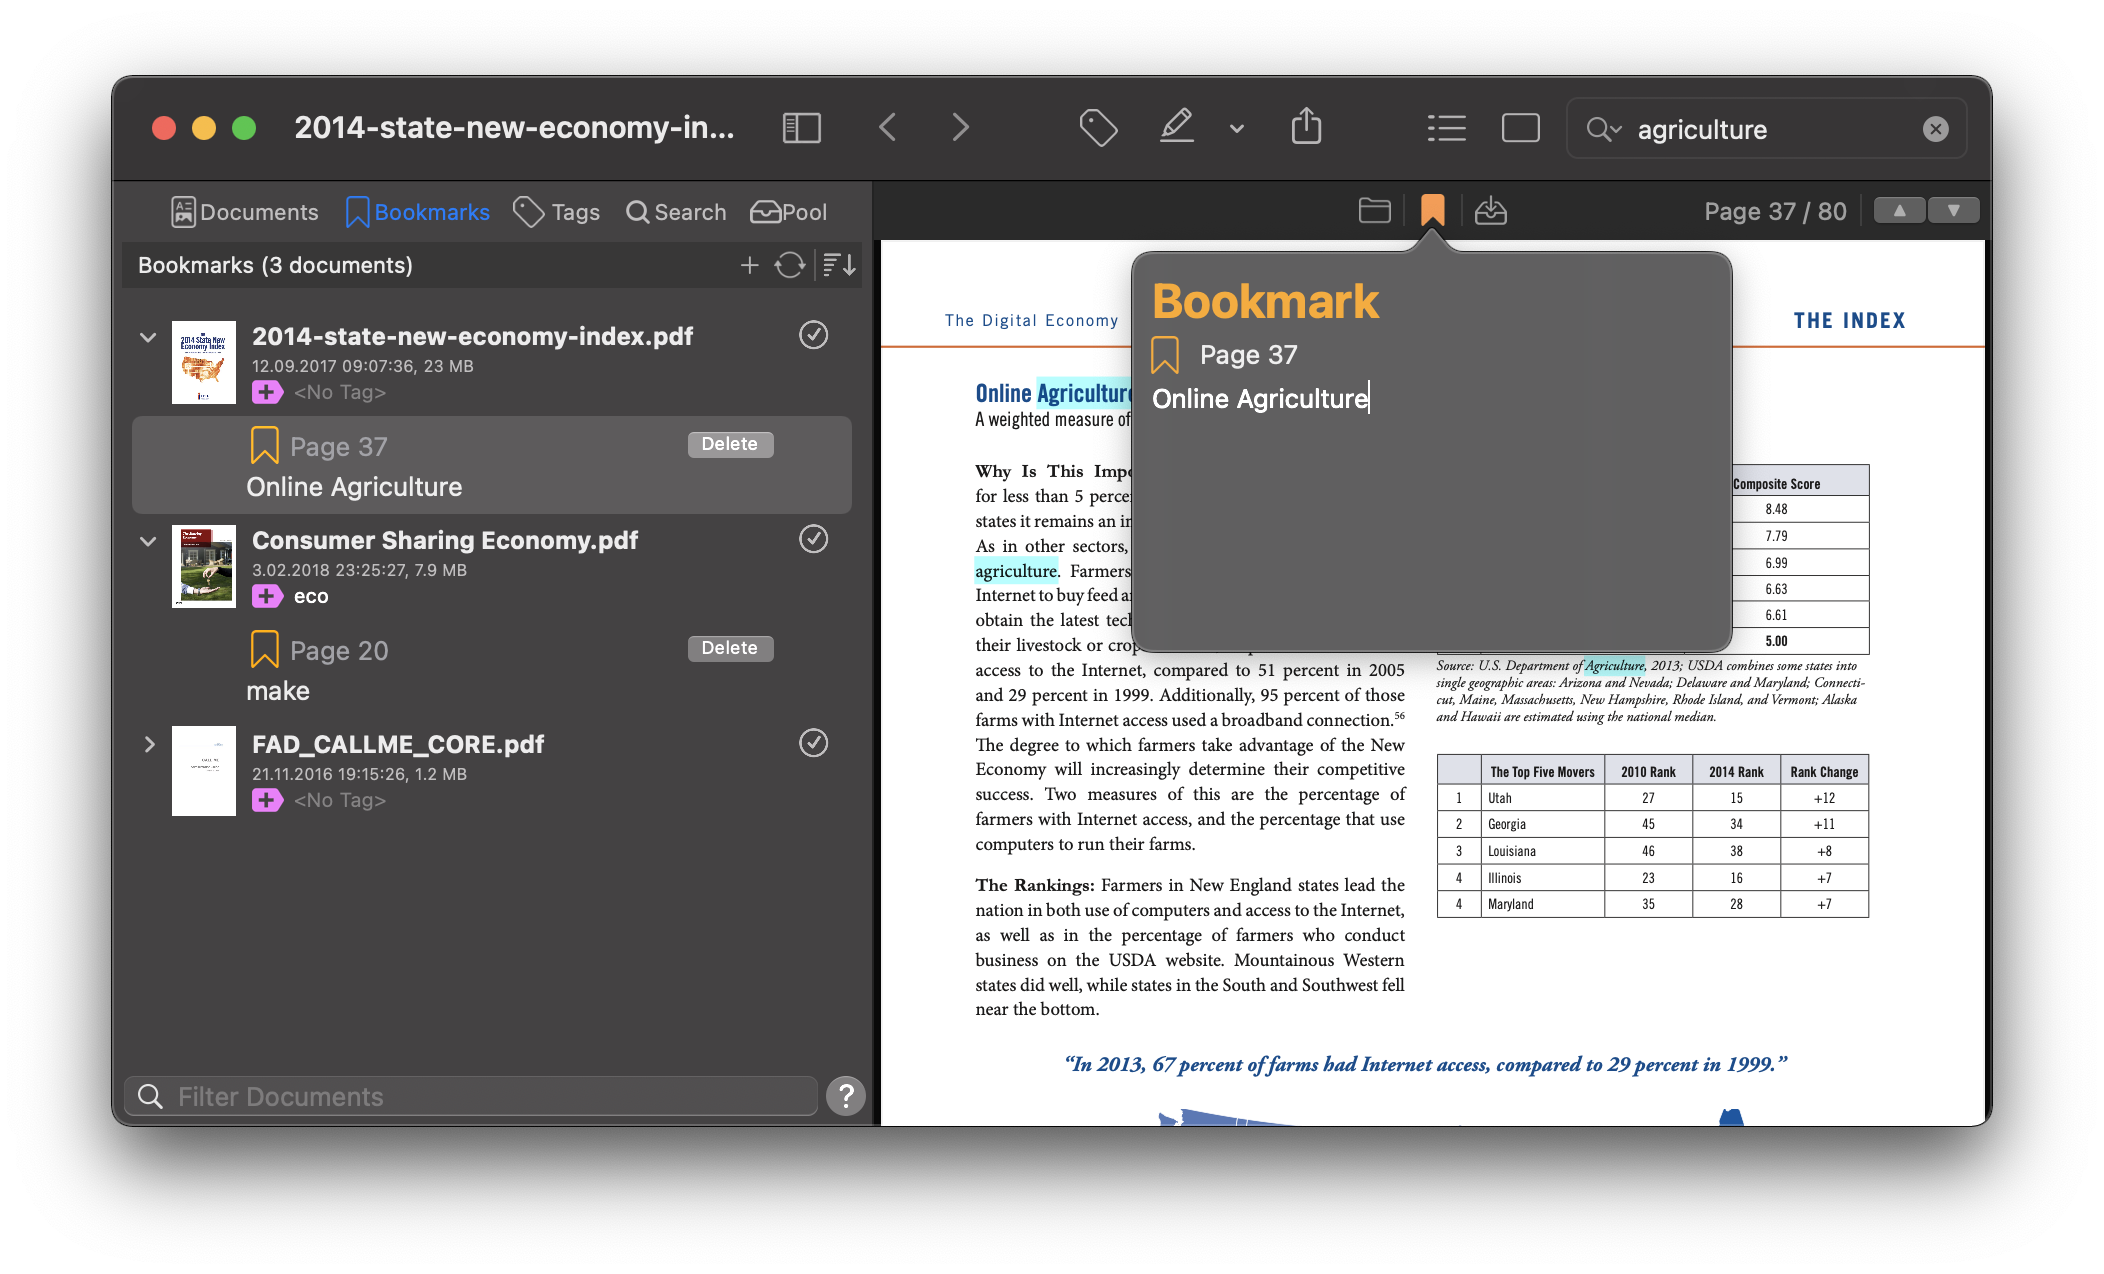
Navigate/Delete Bookmarks
Open the bookmark tab in the sidebar to navigate or delete the bookmark. Here you can find all bookmarks grouped by documents. To delete, find the relevant bookmark and press the delete button next to it.